The default XBar and Range report does not show the Cpk value, but it is possible to add that value to the template. This document gives step-by-step directions for inserting the Cpk value into the default XBar and Range full-page template. The same general instructions can be used for inserting other values into reports.
Getting into the Report Designer
In order to add the Cpk value to the report, the Report Designer must be used. These are the general steps for getting into the Report Designer for the template we are about to change.
- From QC-CALC SPC choose the Report – XBar & Range menu.
- Choose the dimensions and click OK.
- On the next screen that shows the 2 graphs, click the Print button.
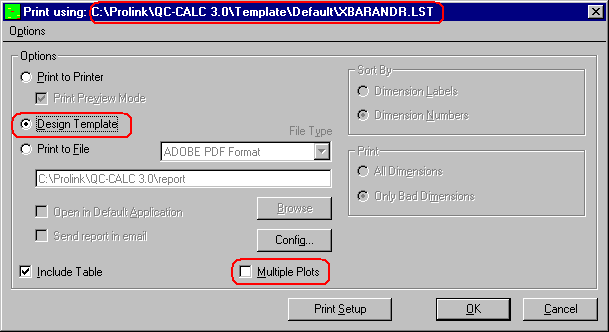
- The next screen is the Print screen. Verify the template location at the top of the screen is the template you want to edit (use the Options – Select Templates menu to change the template location or the Options – Copy Templates menu to move a copy of the template to a different location) and make sure the Multiple Plots check box is unchecked, then choose Design Template and click OK.
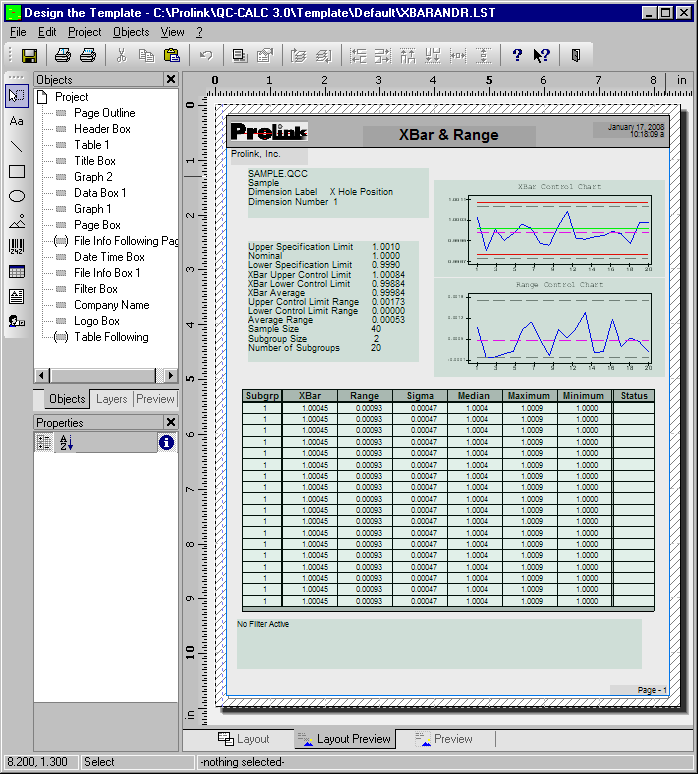
- The Report Designer now appears on the screen.
Adding Cpk to the Calculation Box
These directions will talk you through adding the Cpk value to the box that contains the rest of the calculations.
- In the Object List in the upper left corner (View – Windows – Object List if it is not visible) double click on the “Data Box 1” object (you can also double click on the item on the right side of the screen and accomplish the same thing).
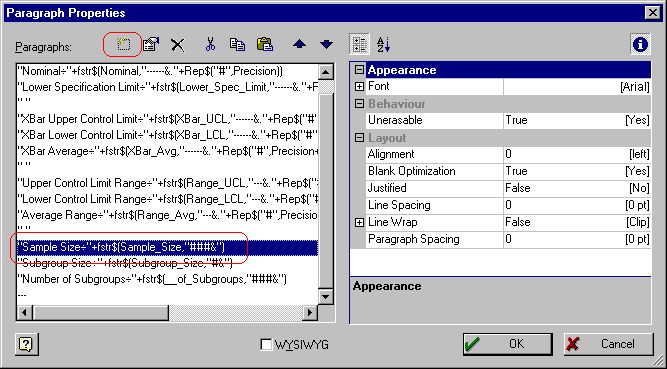
- The Paragraph Properties window is now displayed. Highlight the line you would like to have below the Cpk line we are going to add and click the Insert a Paragraph button.
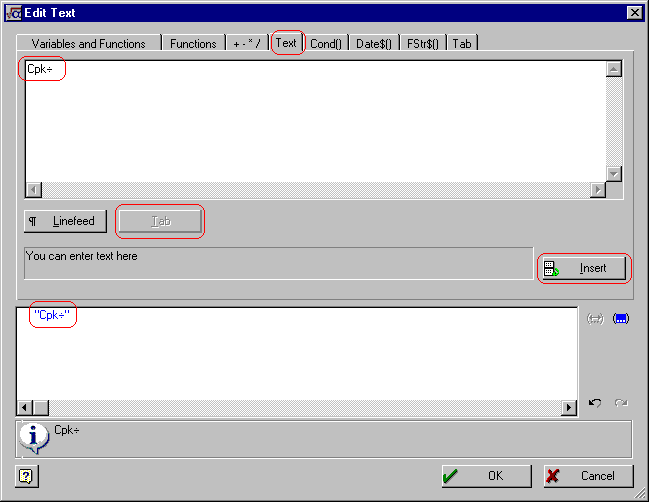
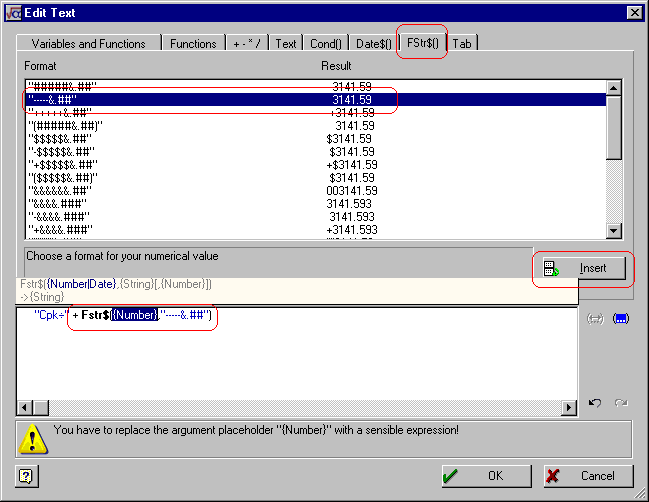
- In the Edit Text window that appears, go to the Text tab and type “Cpk” in the upper box, then click the Tab button (this will insert a ÷ sign after the “Cpk” you typed.
- Now click the Insert button. The text you typed will automatically be surrounded by the “ “ that are necessary and shown in the bottom window.
- Now go to the Fstr$() tab, choose the second format in the list (“-----&.##”), and click the Insert button. This format can be adjusted to hold more decimal places by adding more # in the bottom window (i.e. “-----&.####”).
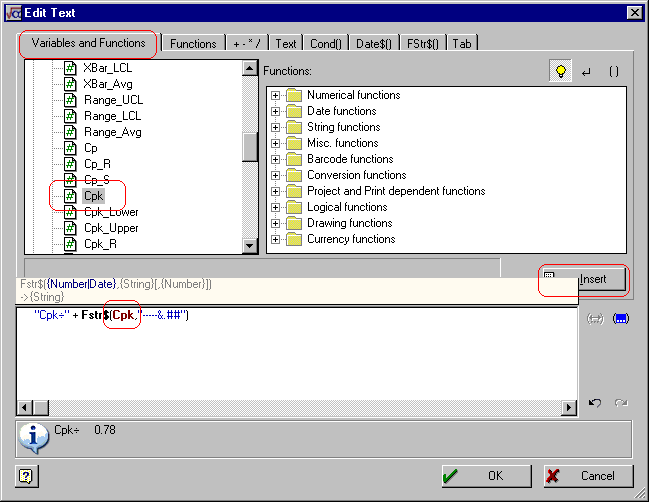
- With the “{Number}” item highlighted in the lower window, click on the Variables and Functions tab. Highlight the Cpk value in the Variable list and click the Insert button. The “Cpk” variable will have replaced the “{Number}” in the lower window.
- Now that we have taken care of what will appear on the line, we need to take care of the position of the Tab (÷) character we inserted when working in the Text tab.
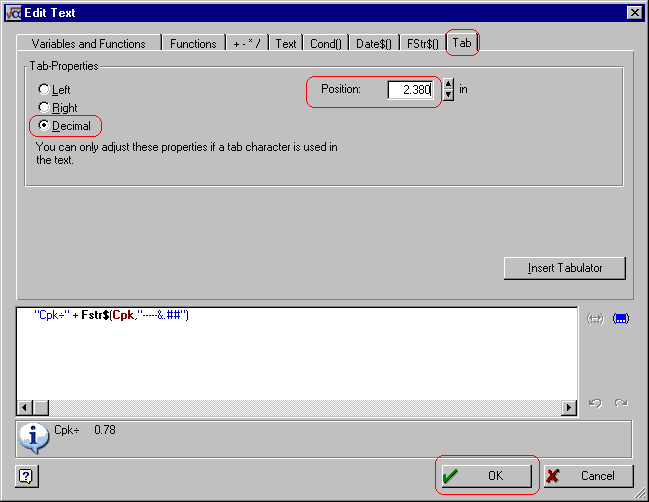
- Click on the Tab tab and choose Decimal for the type of tab and set the Position to 2.380. To verify this value is correct and will line up with everything else you can look at the Tab setting for one of the lines around where you inserted the Cpk line.
- Now click OK on the Edit Text and Paragraph Properties windows.
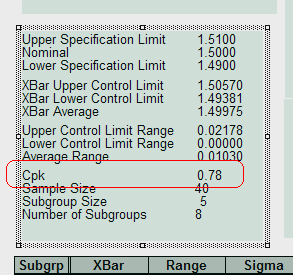
- When you look at the “Data Box 1” area of the Layout Preview screen you should now see the Cpk line in the box. Make sure that all lines are still visible. You may need to stretch the window to get enough room for all lines to show.
- Click File – Save, then File – Exit to get out of the Report Designer and run your report to see how it looks.