This White Paper gives step-by-step instructions for designing your own custom template and adding the words “PASS” or “FAIL” to the header area of the standard First Article template. The PASS/FAIL item will be based on the Number of Fails = 0 (no dimension were out of specification = “PASS”) or the Number of Fails > 0 (at least 1 dimension was out of specification = “FAIL”).
The Report Designer
The directions shown here will add “PASS” or “FAIL” to the header area of the report. This is a lengthy process, but relatively simple to accomplish.
- From QC-CALC Real-Time choose the Report – Design Template menu.
- Choose the OnePiece.FST template from the list of files that appears and click Open.
- The Report Designer now appears on the screen.
- In the Layers area in the upper left corner (View – Windows – Layers if it is not visible), uncheck the “TableLayer” item. This will make it a little easier to work because fewer items will be shown on the page while we’re working.
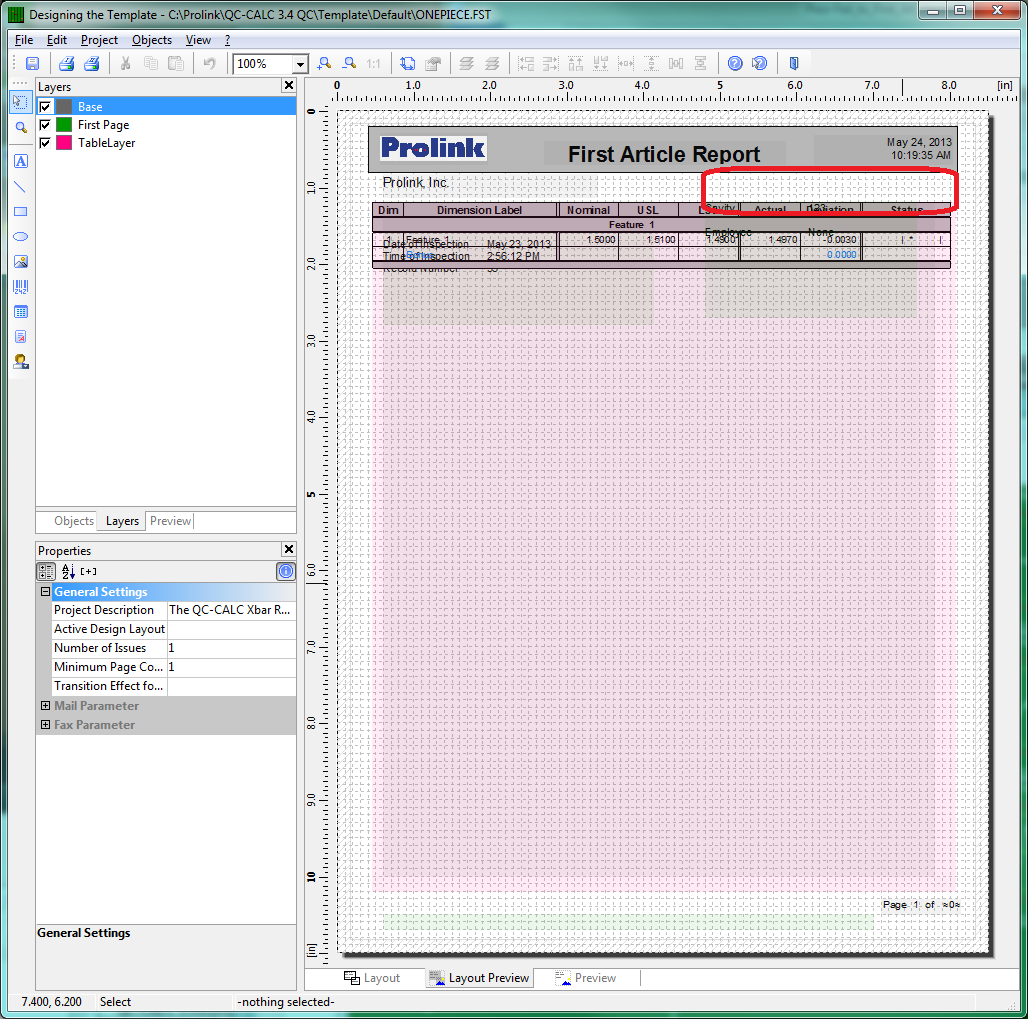
- Next choose the Objects – Insert – Text menu and draw a rectangle in the upper right area (below the title box). This will be the area (circled in the picture above) that will display either “Pass” or “Fail” on the report.
- In the Edit Text window that appears choose the Condition tab and click the Edit button in the Condition area at the top.
Note: For QC-CALC versions 3.2 and 3.3, the Edit Text window does not automatically appear so you need to double-click in the box you just drew and the Paragraph Properties window will appear. Double-click on the “---“ line in the box to insert a new line in the Text object and at that point the Edit Text window will appear.

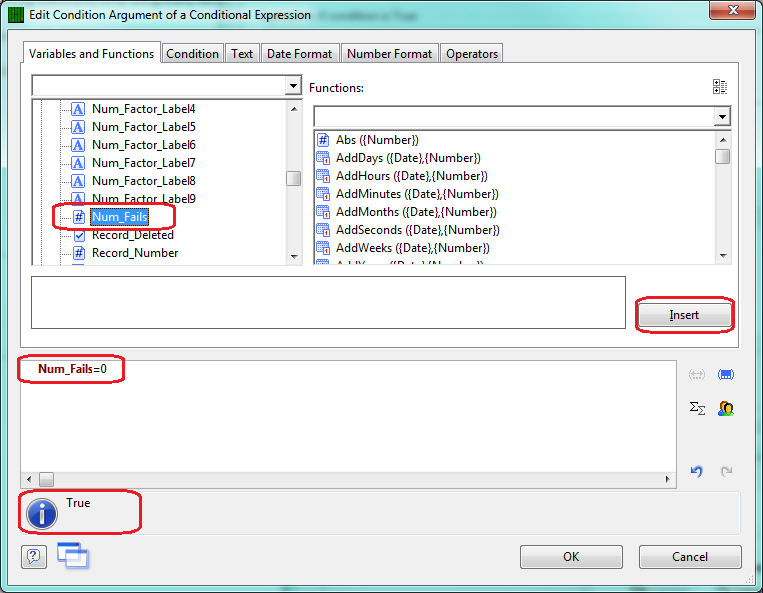
- In the Edit Condition Argument of a Conditional Expression window that appears, choose the “Num_Fails” items from the list of Variables in the upper left area then click the Insert button. The variable you chose will be automatically moved to the bottom window, and you need to add “=0” after Num_Fails in that area. Once you do that you should see either “True” or “False” in the result area at the bottom. If there is an error it will be shown in that same area. Click OK.
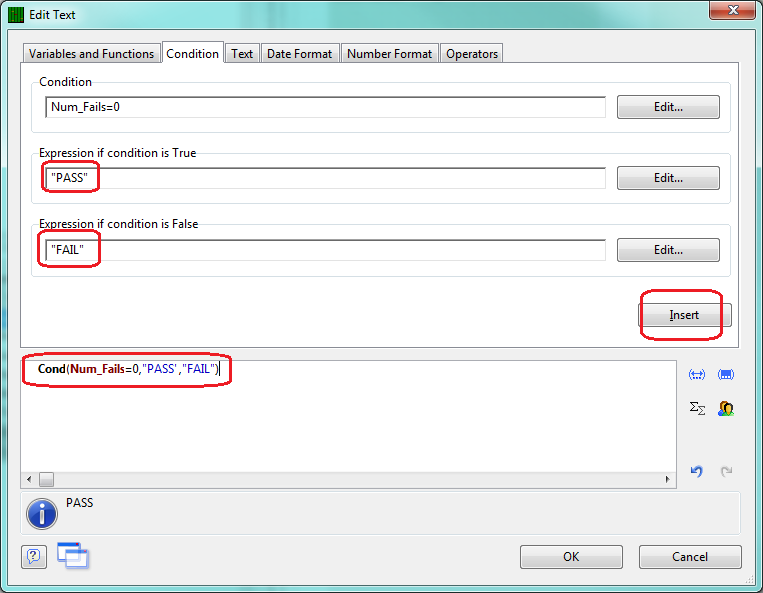
- Back on the Condition tab of the Edit Text window you should now see the “Num_Fails=0” in the Condition area. Type “PASS” (including the quotes) into the Expression if condition is True area and “FAIL” (including the quotes) into the Expression if condition is False area. Now click the Insert button and the condition statement you just built will be written into the area at the bottom of the screen.
- Click the OK button and you will return to the main Report Designer screen.
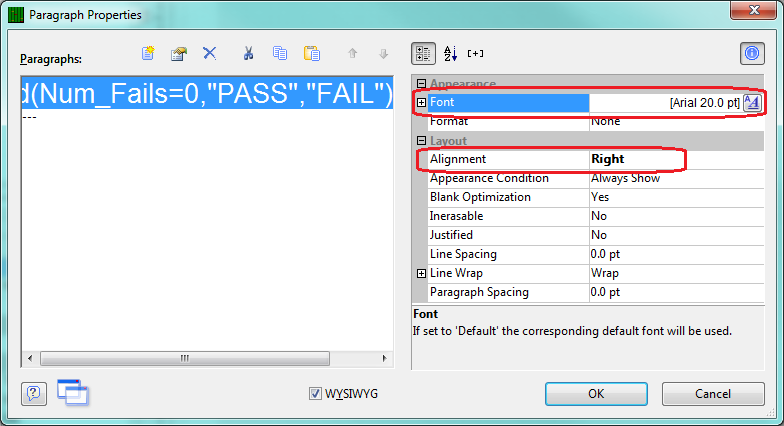
- To change the font used for that area, double-click on the box that was just created and the Paragraph Properties window will appear.
- With the “Cond(“ line highlighted, change the Alignment to “Right” and change the Font size to “20” (or whatever looks good to you).
- If you would like “FAIL” to appear in red, then click the + next to the Font item to see all of the Font properties.
- Click in the right column for the Color item at the bottom and click the down-arrow button that appears. Scroll through the list of colors and choose the “Formula…” item at the very bottom of the list (as shown to the right).
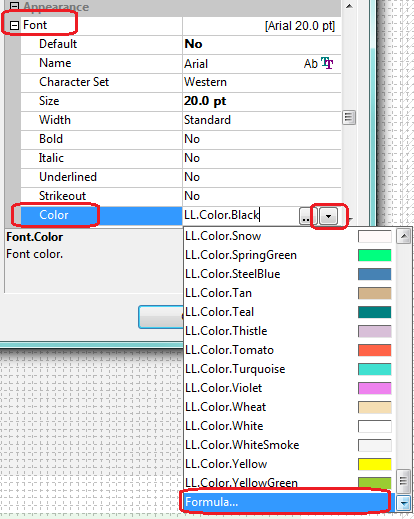
- In the Edit Font.Color window that appears choose the Condition tab and enter “Num_Fails=0” (do not include the quotes) as the Condition, “RGB(0,0,0)” for the Expression if condition is True and “RGB(255,0,0)” for the Expression if condition is False item. Do not enter any of the quotes!
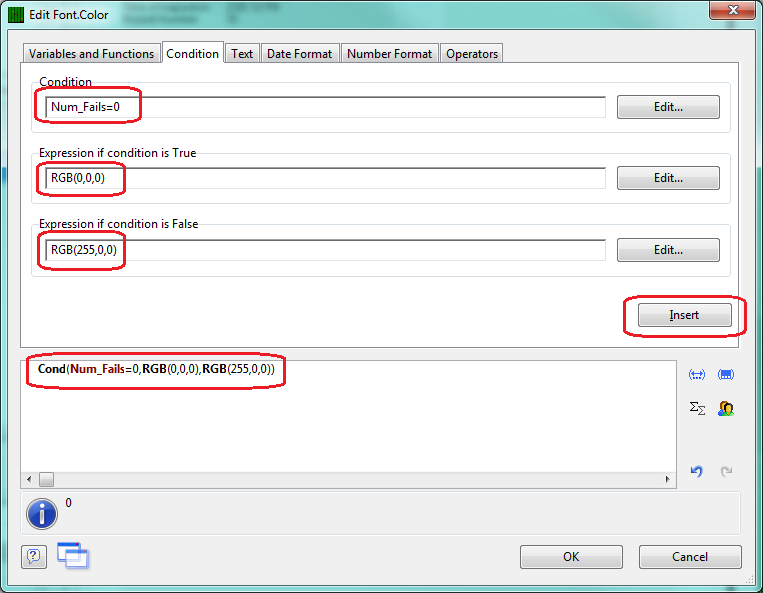
- Click the Insert button to create the entire condition statement, then click OK to enter that as the formula to use.
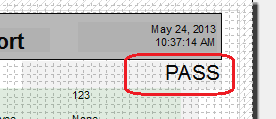
- Now click OK on the Paragraph Properties window and you should now see a larger sized “PASS” or “FAIL” in the upper right corner of the Layout Preview area.
- In the Layers area check the “TableLayer” item again.
- Click File – Save, then File – Exit to get out of the Report Designer.
- Now run your First Article report using the template you just changed.