Introduction
Here are some easy things to test when evaluating QC-CALC Real-Time with the Training CMM.
Automatic Part Switching
Whenever a new part program is run and data is sent to QC-CALC, a new database is automatically created for the part program. QC-CALC then switches the file that is open to show the new data.
When data from a previous part program arrives, QC-CALC automatically matches the data to the previous part program, switches back to that part program's database, and appends the data. You'll notice it simply picks up right where it left off.
How to Test It:
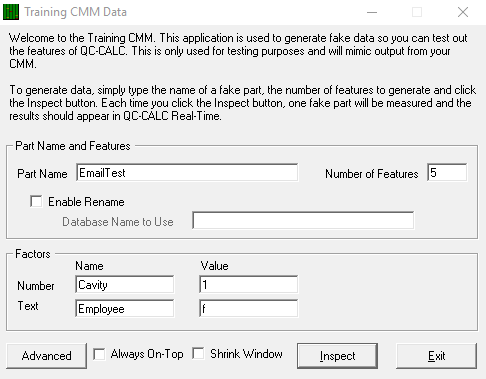
- In the Training CMM, simply name the Part Name something you'll remember such as "Part Test 1".
- Inspect a few parts by clicking Inspect multiple times.
QC-CALC Real-Time will plot the data as it arrives.
- Change the Part Name to something different such as "Part Test 2" and click Inspect a couple of times.
QC-CALC will switch to the new Part Program and begin plotting the new data.
- Change the Part Name back to the original ("Part Test 1") and click Inspect a few more times.
You'll notice QC-CALC switch back to the original part program and add the data to the end of the plots.
Sending Non-Measurement Data to QC-CALC
The Training CMM allows you to test sending non-measurement factors to QC-CALC by providing 1 numeric and 1 text factor. These are visible in QC-CALC Real-Time in the Point Properties window as well as various reports (such as the First Article Report).
How to Test It:
- Open QC-CALC.
- In the Training CMM, create a new part program and name it "Part Test 3" with 12 Features.
- Inspect 3 parts.
- In QC-CALC Real-Time, choose View > Point Properties.
The Point Properties window will appear at left.
- Approximately half way down the Point Properties window, you will see "NumFactor 1" and "TxtFactor 1".
- As you move your mouse over the first 3 points on each plot, you will notice that the values for these fields are not set.
- In the Training CMM, there are two pairs of Name/Value fields corresponding to Number and Text at the top of the screen.
- For the Number field - add a Name called "Lot Number" and a value of "333".
- For the Text field - add a Name called "Operator" and a value of "Bob" (or your own name).
- Inspect another 5 parts by clicking Inspect 5 times.
- In QC-CALC, move your mouse over all 8 points and you should see that the "NumFactor 1" and "TxtFactor 1" have been renamed to "Lot Number" and "Operator" respectively for all parts. For the last 5 parts, you will see the values you added.
Outside Control Limits & Outside Tolerance
Data from the Training CMM is created randomly, so it will typically look a little wild. Most likely (hopefully!) your data will be much more consistent. Due to the random nature of the data, it's usually pretty easy to see data points outside the control limits or tolerance.
How to Test It:
- In the Training CMM, set the Part Name to "Part Test 3" and the Number of Features to 15.
- Open QC-CALC Real-Time.
- Slowly click Inspect looking at the results before clicking again.
QC-CALC will plot each point. The plot's background will turn gray for each point outside the Control Limits. For each Out of Tolerance, the plot's background will turn red.
NOTE: You may have to click Inspect several times to get a bad point.
- Double-click any plot to zoom in on the plot and see the bad point up close.
Looking at Data History in QC-CALC
QC-CALC allows as much data history as you want to save. There are options that will allow you to limit the database size for each part program, but those are beyond the scope of this topic. For now, we will be talking about how to view present and past data.
How to Test It:
- In the Training CMM, set the Part Name to "Part Test 4" and the Number of Featuresto 15.
- Open QC-CALC Real-Time.
- Click Inspect 35 times to create 35 datapoints in each plot.
As QC-CALC receives the parts it will plot them. Since the default setting for "Parts to Show" is 25, the data will begin to scroll when the 26th point appears.
- You will see a horizontal scroll bar at the bottom of the window in QC-CALC. Slowly click the left arrow to scroll back through the parts. Depending on the value of the right-most point in the plot, if the point is outside the control limits or out of tolerance you will see the plot's background color change accordingly.