This White Paper gives step-by-step instructions for designing your own custom First Article Report template to include multiple pictures before the table is printed.
The Report Designer
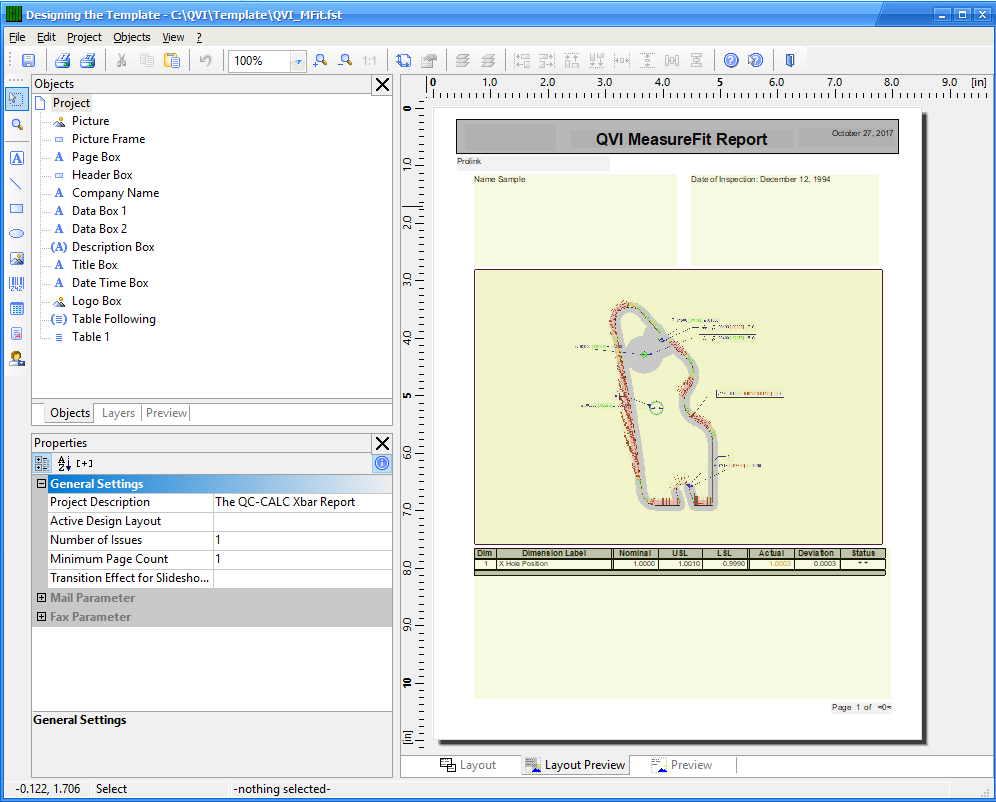
The directions shown here will walk you through modifying your First Article template to include multiple pictures before the table is printed. The base template being used for these directions is the QVI_MFit.fst template which already contains a picture on the first page. This is a lengthy process, but relatively simple to accomplish and may also provide understanding of useful features within the designer for future template customization.
As with any template modification, this may be tailored to suit your needs. This White Paper details how to modify a template to specifically include 3 images, however the same concepts may be applied to create a report including any number of images beyond the single one shown by default.
- In QC-CALC Real-Time choose the Report > Design Template menu.
- Navigate to “C:\QVI\Template” folder, select the “QVI_MFit.FST” template, and click Open. If you receive a message indicating that this template was created with a previous version of List & Label, click OK to acknowledge.
- The Report Designer now appears on the screen.
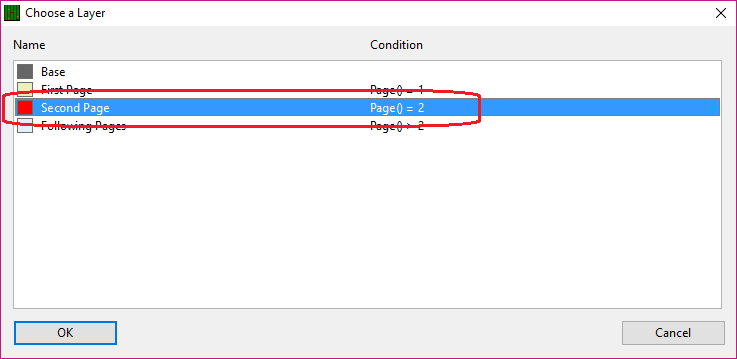
- Choose the Project > Layer Definitions menu to start the process of adding a new layer. Layers are used to control what you see on the screen while you are in the designer and which items are printed on which page.
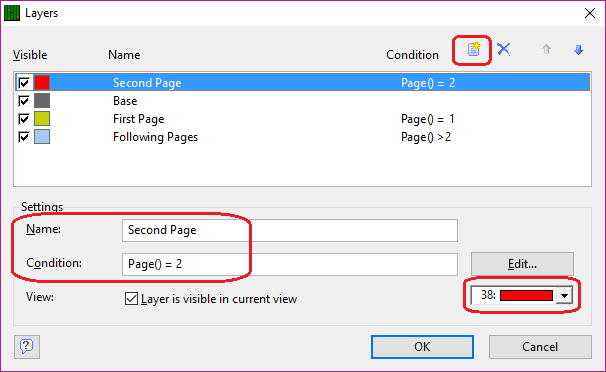
- In the Layers window, choose the Insert Line button to create a new layer. In this example the Name is “Second Page” and “Page() = 2” is the Condition. This means any items assigned to this “Second Page” layer will only be printed on the 2nd page of the report. Change the color chosen in the lower right corner so each Layer has a different color.
- Next, choose the “Following Pages” item. The Condition needs to be updated so that items assigned to this layer do not print until AFTER the 2nd page of the report. Change the Condition value to “Page() > 2” to accomplish this, then click OK.
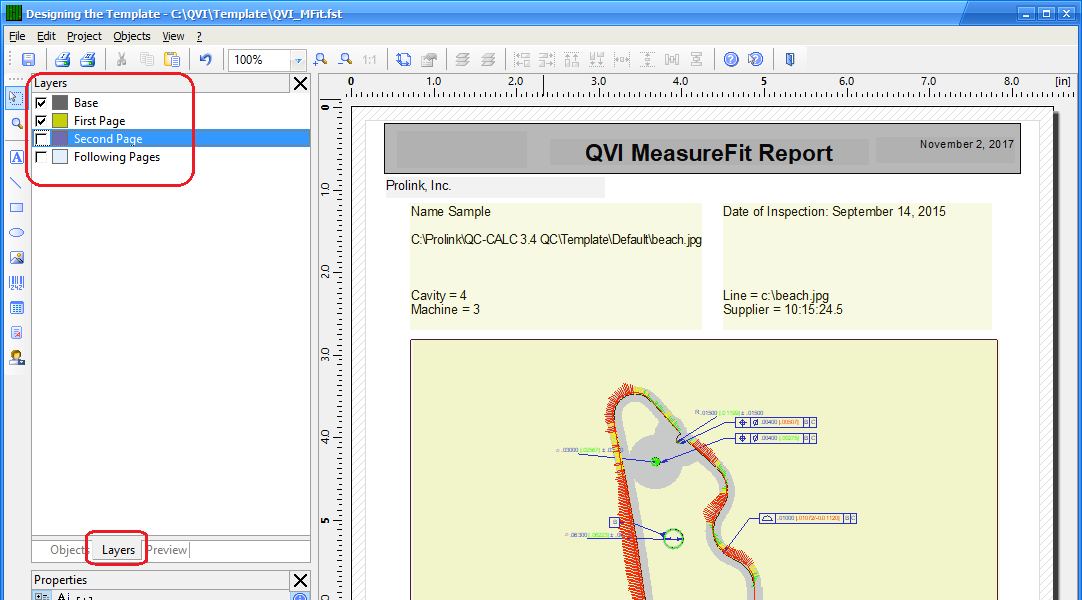
- In the upper left section of the main screen, choose the Layers tab. Unchecking layers allows you to remove the clutter of other objects on other layers from your view. You will use this tab multiple times throughout this process. In this instance, we will leave the Base and First Page layers checked so only they are visible in the preview.
- Choose the Objects tab instead of the Layers tab in the upper left area. This shows a list of all objects within the template. Right click on Table 1 and choose to Delete. This removes the table of numbers from the first page, which leaves only the picture and the Factor values on the “First Page” layer.
Copying the Existing Picture and Frame
This section is going to copy the “Picture” and “Picture Frame” objects from the “First Page” Layer to the “Second Page” Layer, so there will be 2 pictures on the 2nd page when we are done.
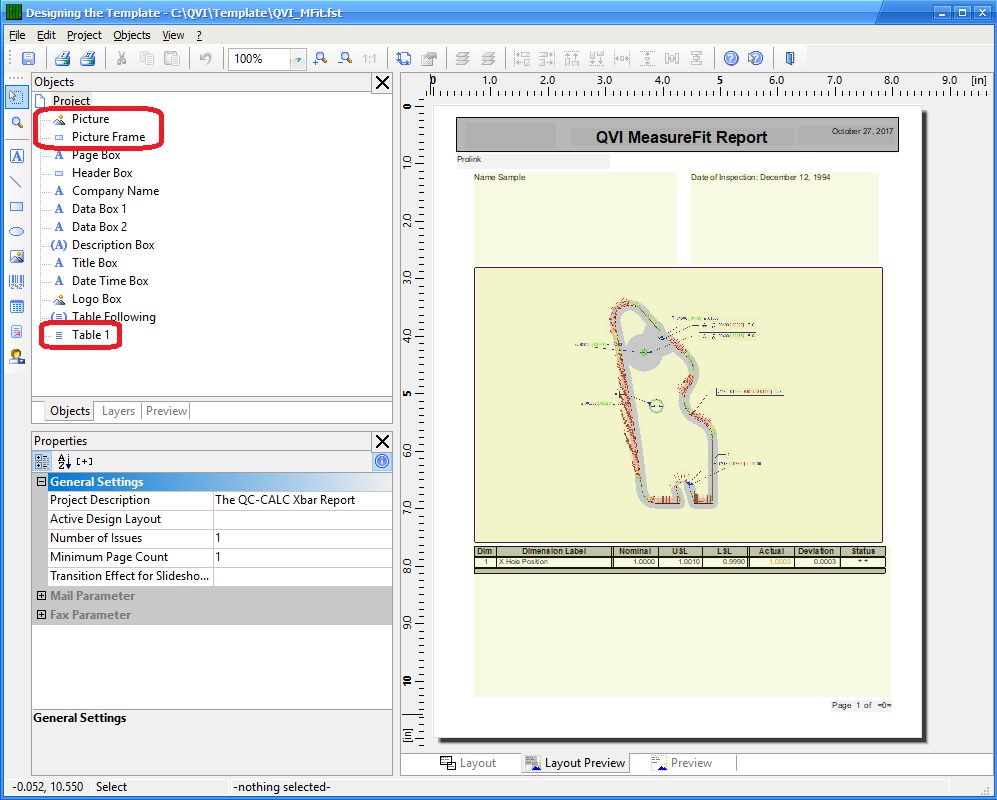
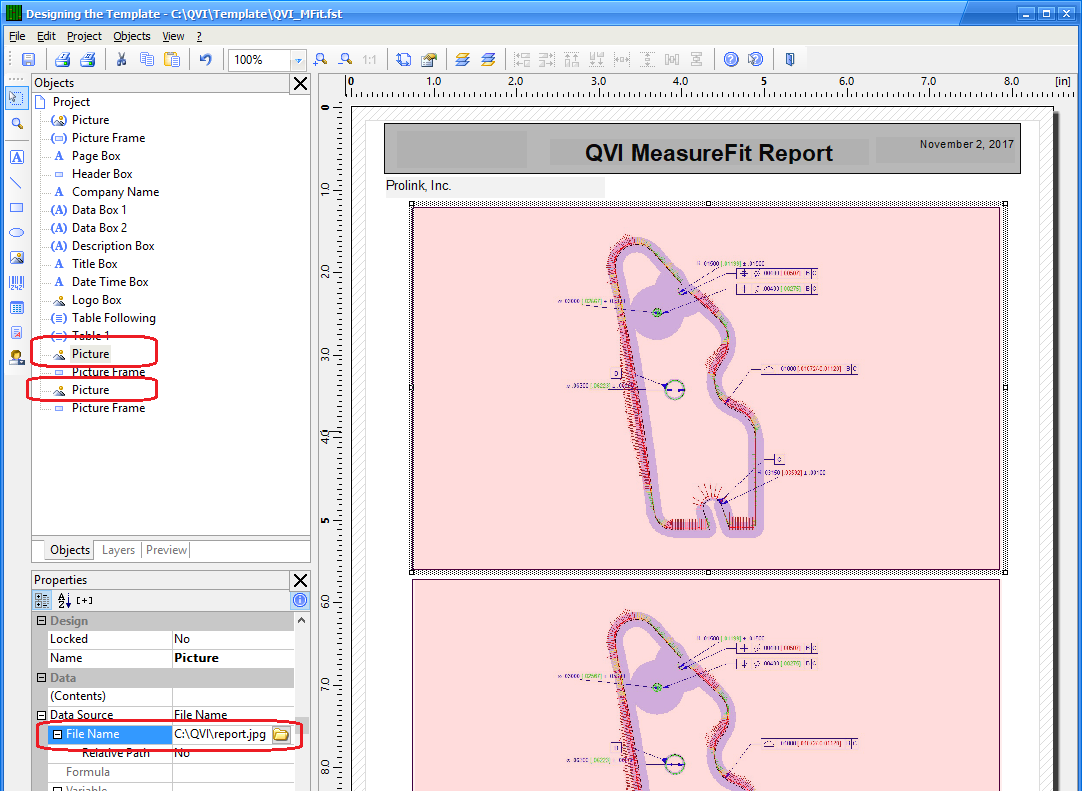
- On the Objects tab, select the “Picture” and “Picture Frame” objects by using the CTRL key and clicking both.
- Now right-click, choose the Copy to Layer menu, and the Choose a Layer screen appears.
- Choose the “Second Page” layer and the picture and frame will be copied and assigned to that layer.
- The “Second Page” layer is not visible at this point so you will not see anything on the right side of the screen, but there will be 2 new items at the bottom of the Objects area with ( ) to the left of the words. NOTE: The parentheses mean that item isn’t currently visible.
- Use the Layers tab to hide the “First Page” layer, then check the “Second Page” layer to make that visible.

- Repeat steps 1 through 3, but choose the bottom “Picture” and “Picture Frame” items that are visible on the screen now. These are the copies you just made on the “Second Page” layer.
- Now that you have used the Copy to Layer option you are seeing 2 pictures and frames on top of each other in the Layout Preview area (right side of the screen). The pair that was just copied onto the layer is selected. Use the Shift + Down Arrow keys to slide your 3rd picture and frame down the page.
- Highlight the “Picture” and “Picture Frame” objects just above the currently highlighted ones in the Objects area, then use the Shift + Down Arrow keys to slide your 2nd picture and frame up the page so it is no longer overlapping the 3rd picture. You can use the CTRL + Up and Down Arrow buttons to expand and shrink the items if needed.
- Next we need to change the image being displayed in each “Picture”. To do this, choose a “Picture” object, then find the the File Name setting within the Properties panel and use the folder icon to choose the picture to display. You can tell which picture you have selected by looking for the frame around an object in the Layout Preview window (right side of the screen).
Fixing the Appearance Condition
In previous versions of QC-CALC the Condition for a Layer did not control the objects on that layer appearing at print time. In those versions an Appearance Condition that typically matched the Condition on the Layer was assigned to each object. This has since changed, but many templates have not been updated to remove the extra Appearance Conditions that were needed. This section will clear out those old Appearance Conditions.
- In the Layers tab, check all of the layers then click CTRL + Y to select all available objects within the template. You may need to CTRL + click one item if not everything was highlighted.
- With all objects selected, find the Appearance Condition setting in the Properties area and choose “True [Show]” from the list. The field may change to state “Always Show” after leaving that setting.

Controlling the Number of Pages
Normally the pages of the reports within QC-CALC are controlled by tables and how much data there is to display within the tables. In this case we want to print a couple pages before starting to display the table at all. To do this we are going to adjust the Minimum Page Count.
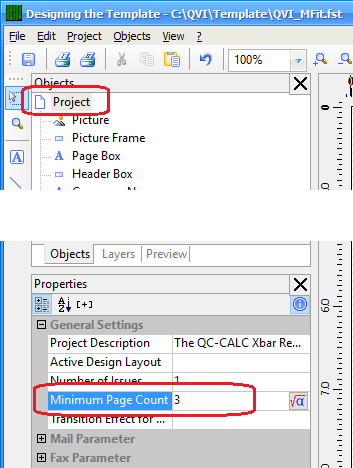
- Choose Project at the top of the Objects area.
- In the Properties area, change the Minimum Page Count to reflect the number of pages that are required to print in order to see the table. In this example we will set it to 3 pages because there are 2 pages with images and the table appears on the 3rd page.
The Final Steps
- Click File > Save, then File > Exit to get out of the Report Designer.
- Now run your First Article report using the template you just modified.