Getting Started
To use your ERS services, you must first activate your ERS License Manager license. This holds the number of services that are allowed to do processing work. Once that is activated, you can then add services and activate them. ERS will need to run as Administrator to start the services you activate, so be sure to right-click on the ERS shortcut icon and choose “Run as Administrator” when starting the software.
Activating ERS Service License Manager
To activate the ERS License Manager, in ERS 4.1/4.2 go to Tools > Administrator > Service Related > Service Settings. You will be prompted for a password. Select the “Master Password” button and then enter the master password. In the Service Settings, select the Activate button in the top right of the Service Settings. ERS will prompt you for an activation code.

Get an activation code from our website
- Open your web browser to www.prolinksoftware.com and then log in using your email and password
- Click on Account at the top, and underneath Owned Products choose Software
- Look for your ERS Service License Manager license
- Click the Activate link underneath that license listing
- Back in ERS, note the Computer ID that is displayed in the Service Settings window
- After clicking the Activate link you will see a field to enter the Computer ID
- Enter a Machine Description to identify the computer this software is installed on.
- Click the Get Activation Code button.
- Copy the provided activation code for your ERS Service License Manager license into the box in ERS
- ERS will confirm the successful license activation
Activating ERS Services
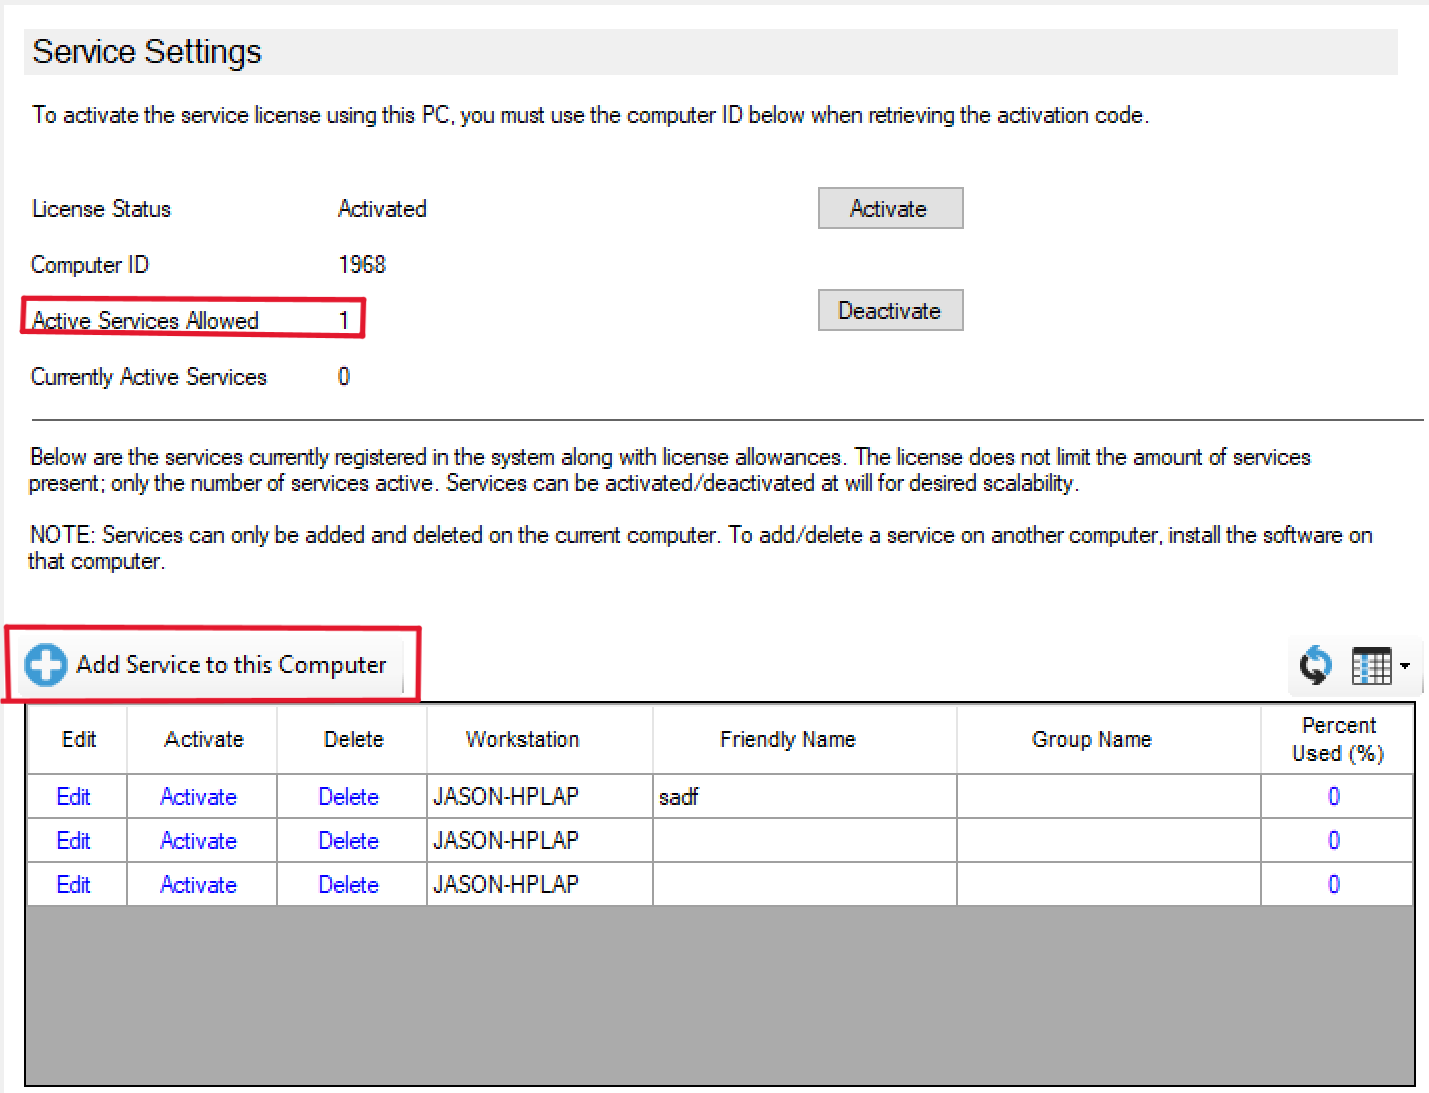
Once you activate your Service License Manager license, “Active Services Allowed” will display the number of services you can activate. To activate services, select the Add Services to this Computer button.
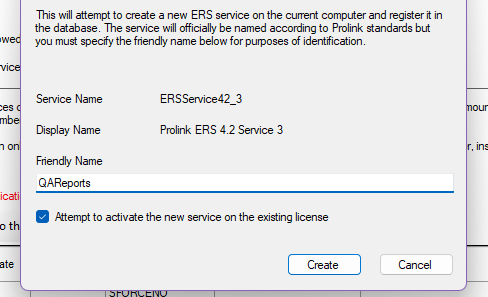
In the Create New Service window, enter a Friendly Name for the service. The Friendly Name will appear in the Processors selection box in the Deliverables tab where you can assign services to deliverables.
Enable the option “Attempt to activate the new service on the existing license” and then select OK.
ERS will confirm successful activation and then your service will be displayed in the Service Settings window. Confirm that the Activation column shows “Deactivate” for your service, this means it’s activated. If it says “Activate”, click Activate to activate the service.
Service Groups
Service Groups allow you to group services and then assign deliverables to the groups instead of assigning individual services. By design, services only process one deliverable at a time. If two reports are assigned to the same service, the second report won’t run until the first one has been processed. Assigning both reports to a service group with multiple services allows the next available service to process the next deliverable which spreads the workload.
Tip: Assigning a deliverable to a service group allows you to easily swap out individual services without having to re-assign services to every deliverable.
Create a service group in ERS
- Go to Tools > Administrator > Service Related > Service Groups
- Select the Add Service Group button (the plus symbol inside a blue circle)
- Enter a name for your service and then select OK
Assign services to a service group
- Go to Tools > Administrator > Service Related
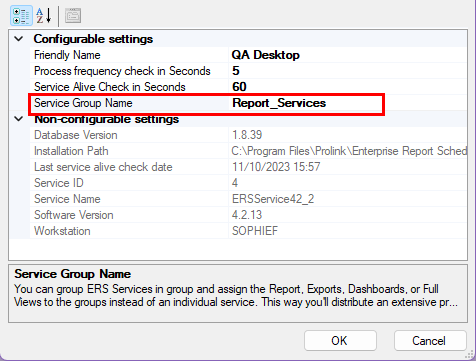
- In the grid of registered services, select Edit next to the service you wish to assign to a group
- Select the cell to the right of “Service Group Name”, then click the arrow
- Choose a service group from the list and then select OK
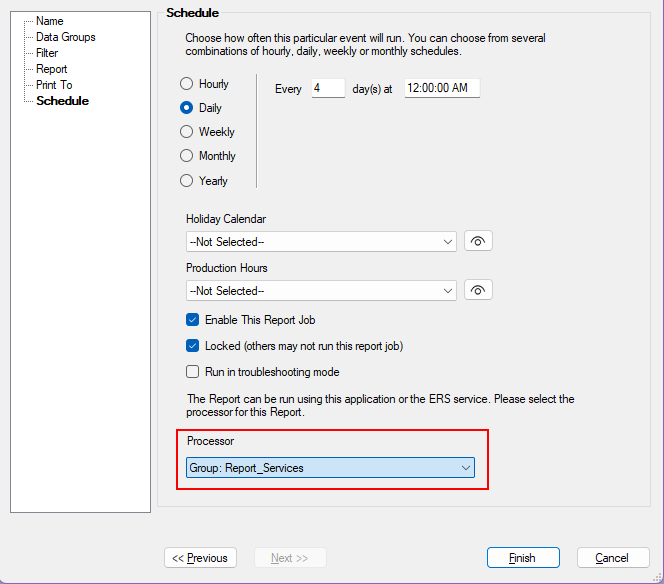
Assign a service group to a deliverable
- Edit one of your deliverables from the Deliverables tab
- Select Schedule in the menu on the left
- Select your service group from the list of Processors
- Select the Finish button to save your deliverable
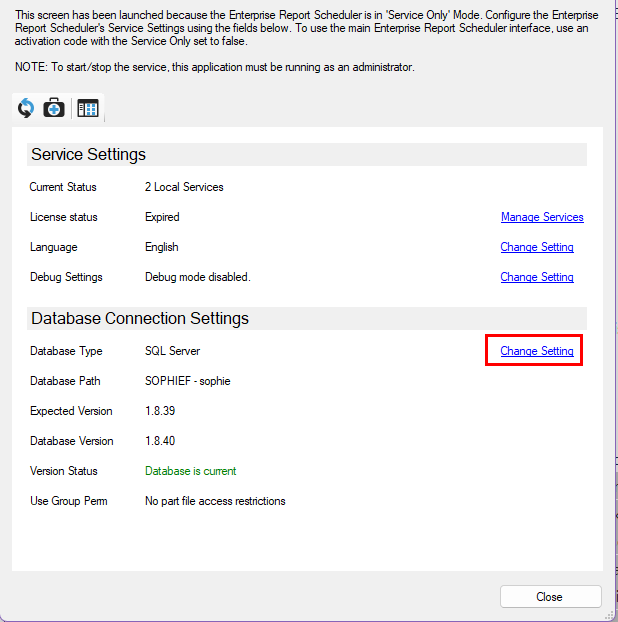
Service vs. Application Database Connection Settings
There are separate database connection settings for ERS services. The ERS application has its own settings found in Tools > Options > Data Storage, and the services have their own, found in File > Show Service Settings > Database Connection Settings.
The ERS application has long supported the ability to quickly switch between database connections. The service is meant to run on just one database at a time and be responsible for deliverables in that database. Having separate connection settings for the service ensures that deliverables run on time regardless of the application’s database connection settings.
The ERS Service Settings Application, shown below, is accessible through the File > Show Service Settings menu in ERS 4.20.