Sometimes, you would like notes to be entered into your reports, but you do not need those notes stored along with your data for future use. A “Form Control” added within your template can collect typed values at run-time from within the Print Preview or PDF screen. This method cannot be used if the report is sent directly to a printer or any file format other than PDF. This White Paper gives step-by-step instructions for designing the template and adding the Form Control object to the header area of one of the standard Raw Data templates.
The Report Designer
The directions shown here will add Text Trace field 1 (the value assigned to the first record in the table) to the header area of the report. This is a lengthy process, but relatively simple to accomplish.
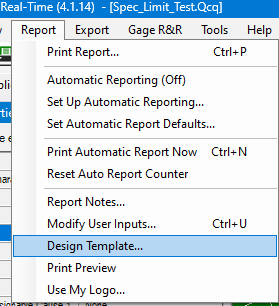
- From QC-CALC Real-Time choose the Report > Design Template menu.
- Choose the DataStat.raw template from the list of files that appears and click Open.
- The Report Designer now appears on the screen.
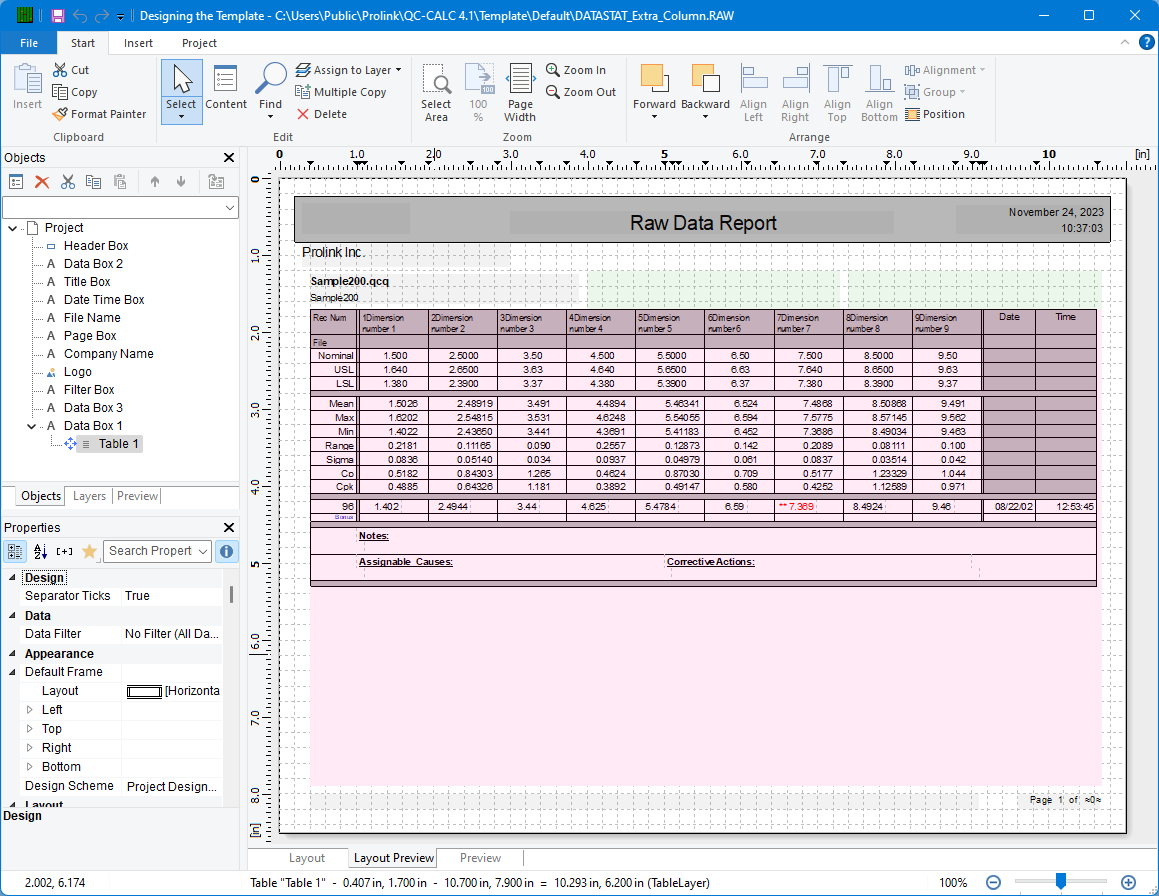
- In the upper left corner change to the Layer tab and uncheck the “TableLayer” item. This will give you clear space to work within the designer. This will not make the table disappear from your report.
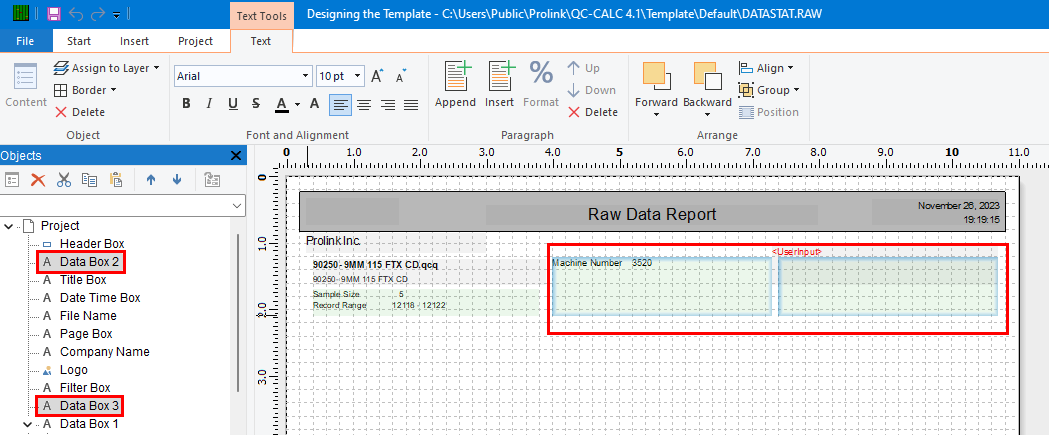
- Change back to the Objects tab. Click on the “Data Box 2” item, then hold down the Control key and click on the “Data Box 3” item. You will see both items surrounded by a frame on the right (shown below). Hit the Delete key to remove them from the report (this spot will be used for the Form Control).
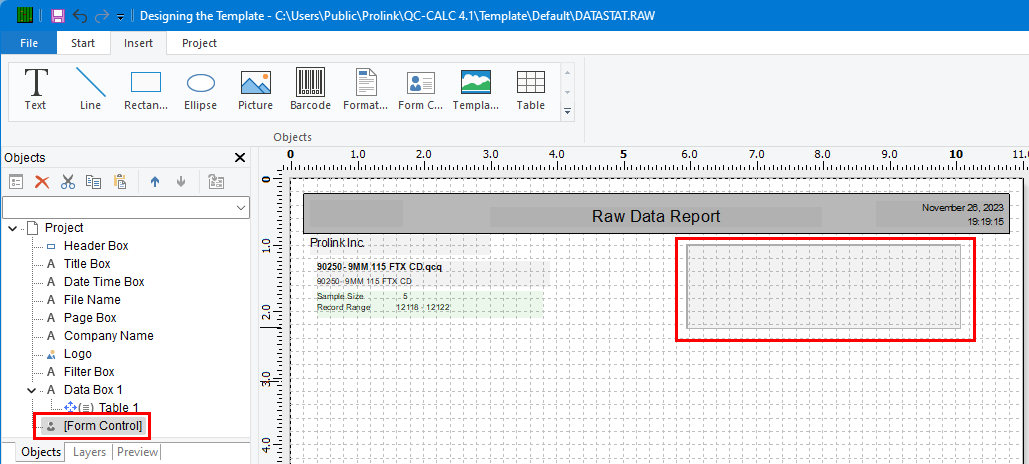
- Choose the Objects > Insert > Form Control menu and draw a rectangle with the mouse in the space that was just cleared out.
- Now we need to adjust the Properties of the new Form Control. In the lower left corner (Properties box – this can be stretched wider if necessary too) change the following:
Force Input Yes (was no)
Multi-line Multi-line (was Single-line)
Tooltip Enter something in “ ” that will tell the user what they need to do.
- Now that Form Control has been entered and has the correct properties overall, the only thing remaining is to make sure it will only print on the first page of the report. To do this, scroll down in the Properties box and change the Appearance Condition line by choosing Formula from the list and the Edit Appearance Condition box will appear.
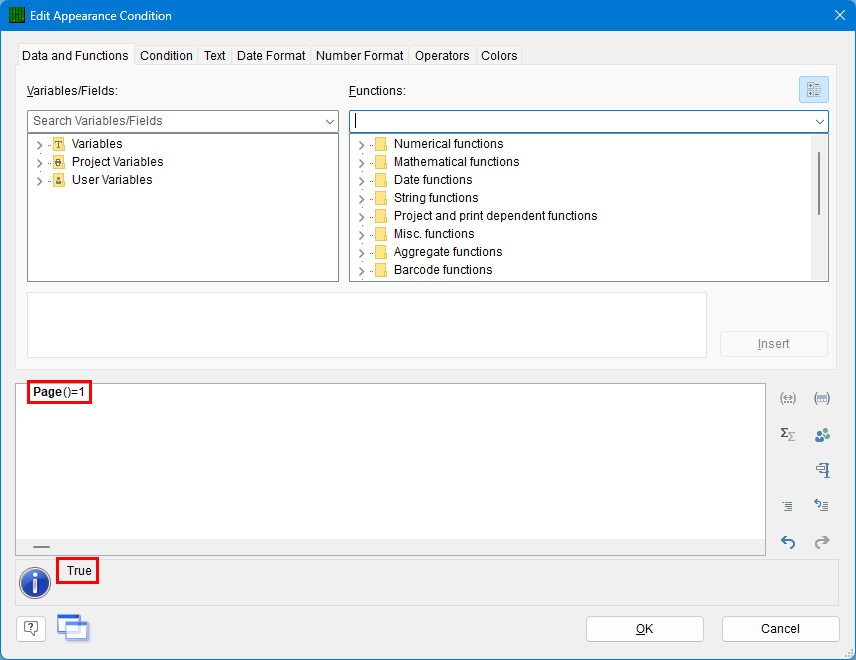
- Enter “Page()=1” and you should see “True” displayed in the status area. Click OK.
- Next, right-click on the Form Control object itself and choose the Assign to Layer menu.
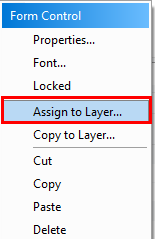
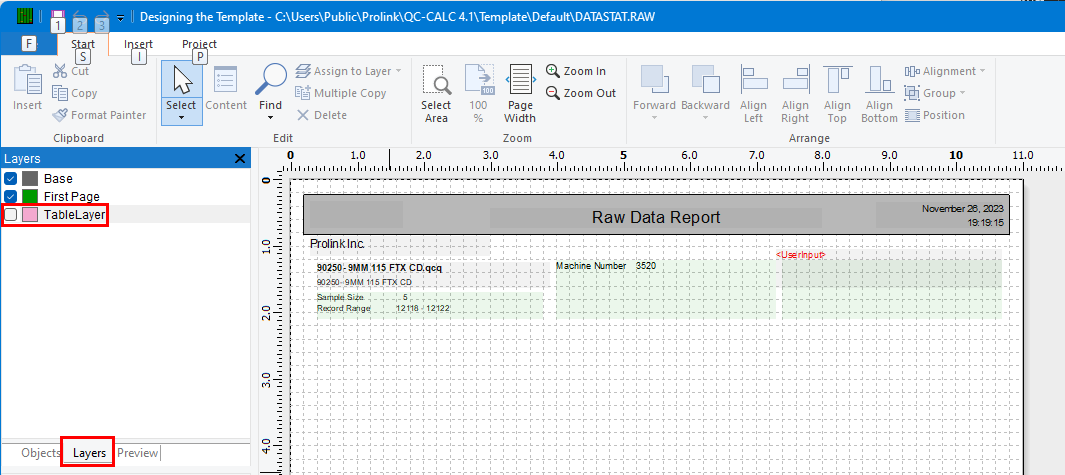
- Choose the “First Page” layer on the Choose a Layer screen and click OK. You should see the Form Control area turn light green in the workspace.
- Finally, on the Layers tab check the “TableLayer” item again (so you will see the table the next time you need to design this template).
- Click File > Save, then File > Exit to get out of the Report Designer.
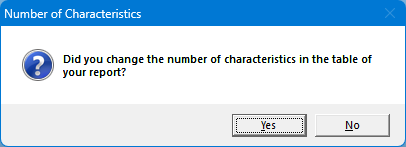
- As you leave the Report Designer you will see a question asking if you have changed the number of dimensions in your report. Choose No.
- Now run your Raw Data report using the template you just changed making sure you are using the Print Preview option or you are printing to a PDF file.
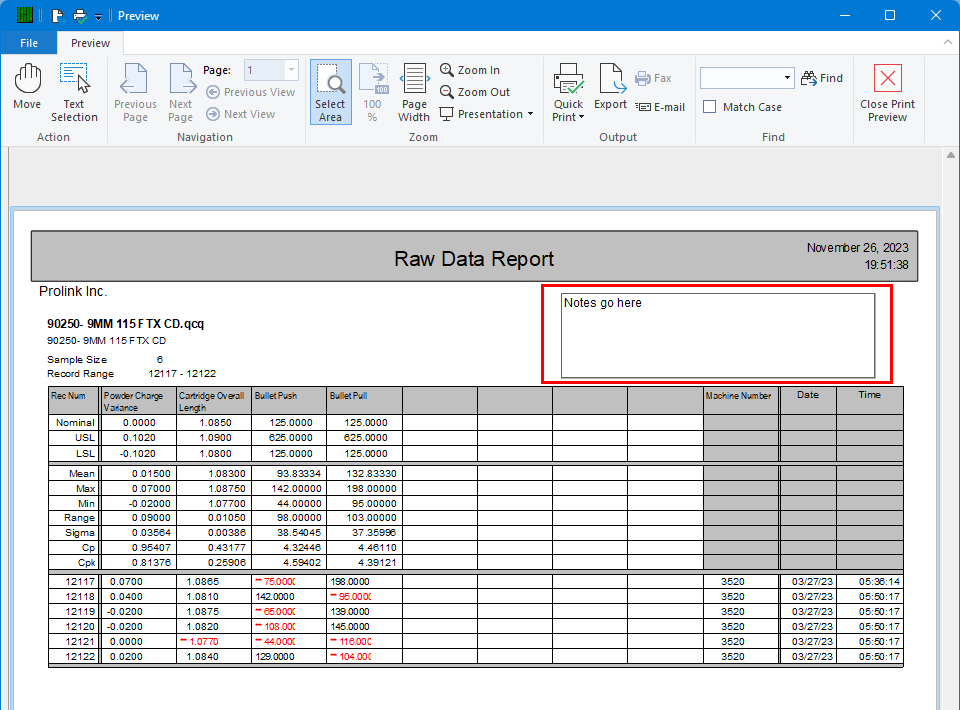
- There is now a red box shown on the screen that the operator can click on, then type a note in. If the report is saved or printed from there the note typed by the operator will be included.