The default First Article - Multiple Parts templates shipped with QC-CALC only show 5 parts. This White Paper will give step-by-step instructions for designing a custom template and adding a 6th part column to one of the standard First Article - Multiple Parts templates.
The Report Designer
The directions shown here will walk you through adding a column for Part 6 in the report and shrinking the remaining columns to make enough room on the page for an additional column. This is a lengthy process, but relatively simple to accomplish.
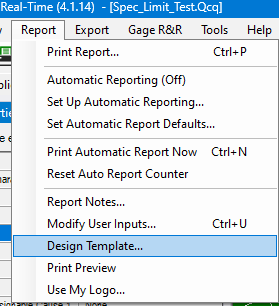
- From QC-CALC Real-Time choose the Report > Design Template menu.
- Right-click the FiveLand.FPF template from the list of files that appears and make a copy of it.
- Select the copy and click Open.
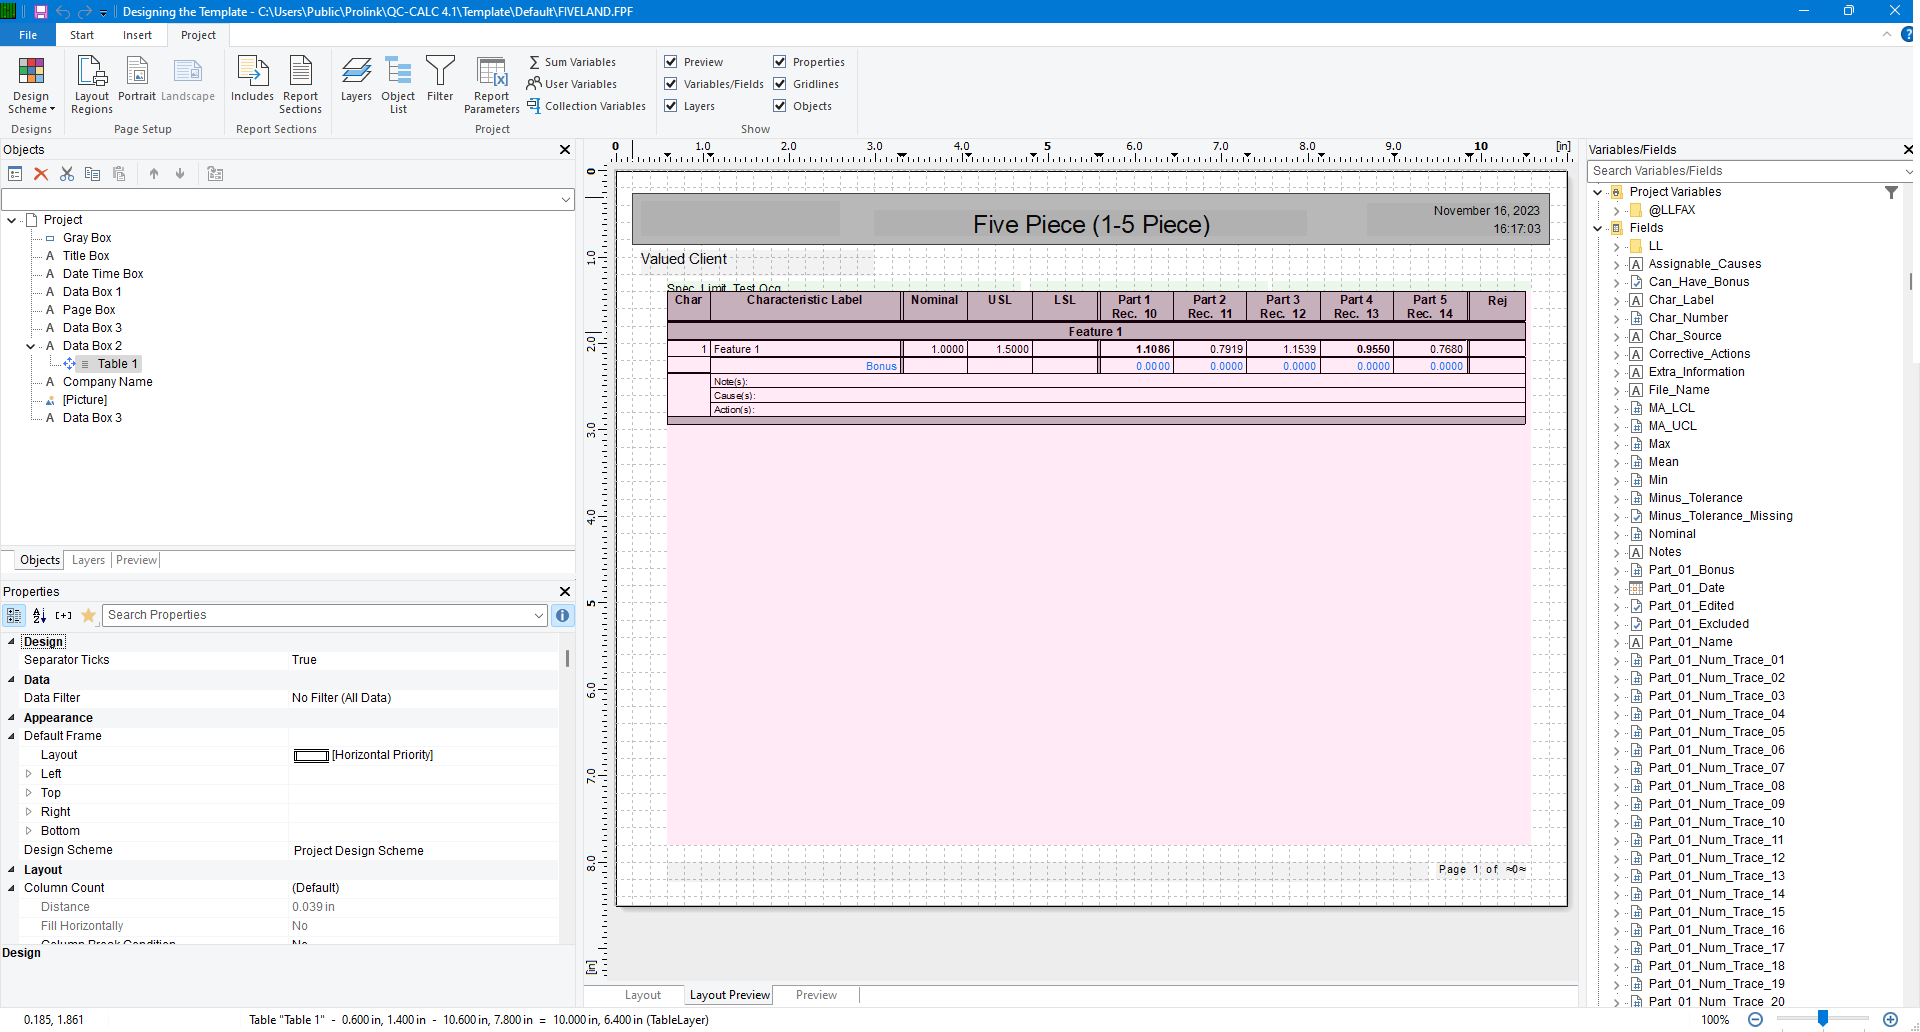
- The Report Designer now appears on the screen.
Making more Space
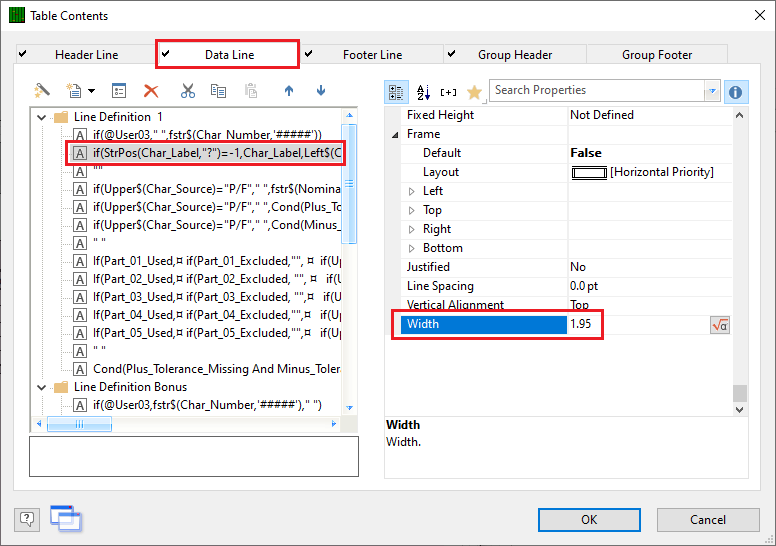
- Double click on the table and the Table Contents window will appear.
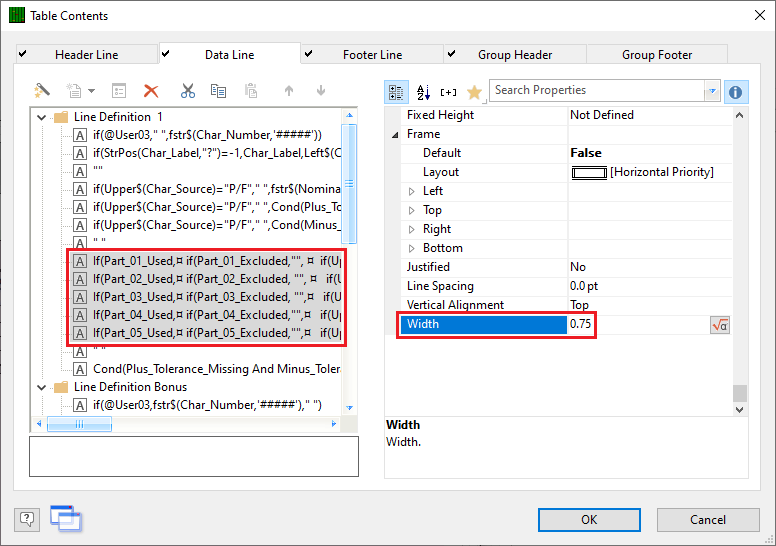
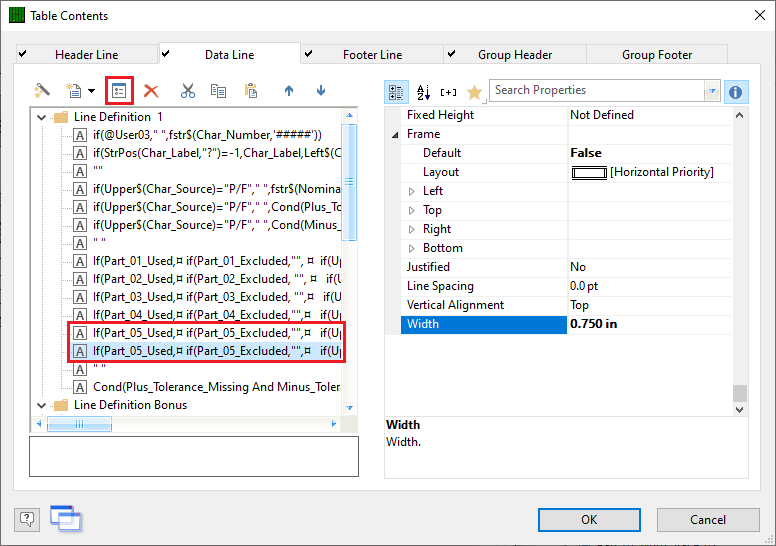
- Choose the Data Line tab, then click on the “Label” line in the Line area. On the right side of the screen change the Width to “1.95.”
- Next, use the Ctrl key to click and highlight the “if(Used_Part_01…” through “if(Used_Part_05…” in the Line area and set the Width for all 5 lines to “0.75.”
- Now that we have made room in the Data area for the additional column, we need to do the same thing in the Header area.
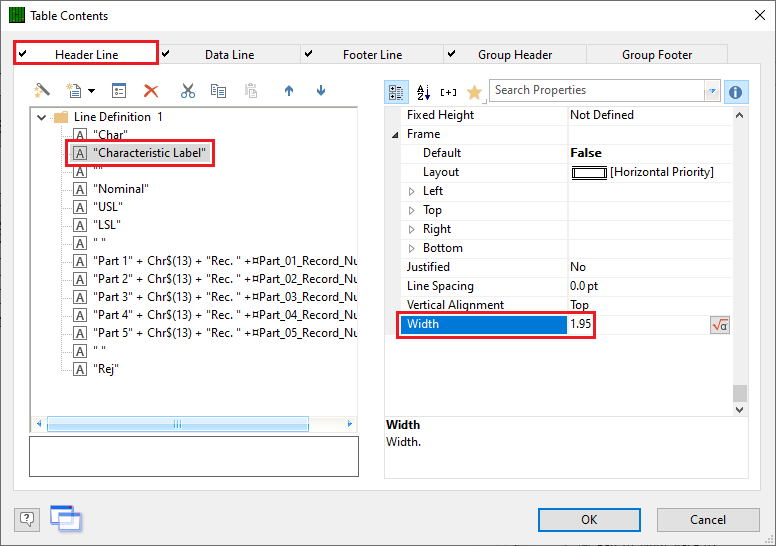
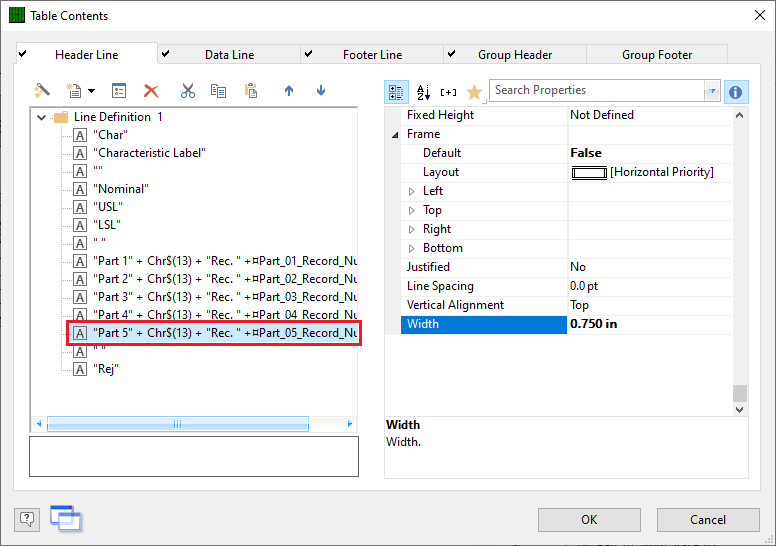
- Choose the Header Line tab then click on the “Characteristic Label” line in the Line area. On the right side of the screen change the Width to “1.95.”
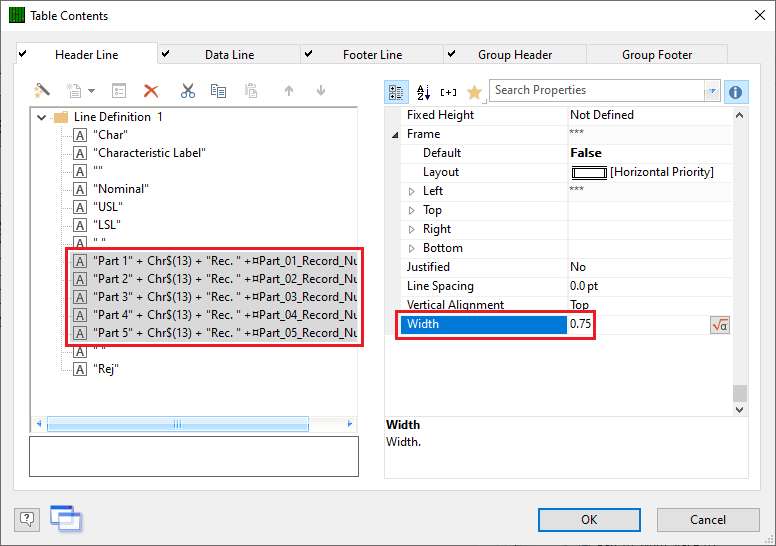
- Next, use the Ctrl key to click and highlight the ““Part 1” + Chr$(13)…” through ““Part 5” + Chr$(13)…” in the Line area and set the Width for all 5 lines to “0.75.”
- Click the OK button, to save these changes.
Adding a Column for Part 6
- Double click on the table so that the Table Contents window will appear again.
- Choose the Data Line tab, highlight the “if(Used_Part_05…” line, then click the Copy line to Clipboard button followed by the Insert line(s) from Clipboard button. This was done so that you can easily get the same exact information in the Part 6 column without having to type in all of these commands.
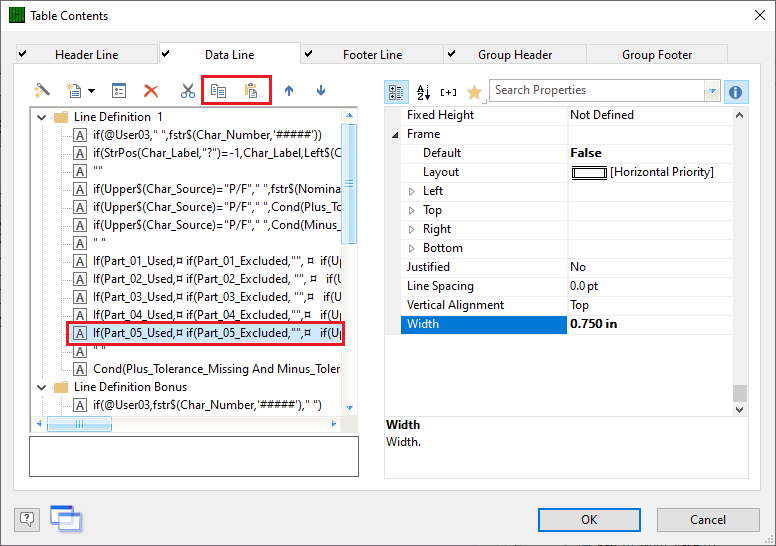
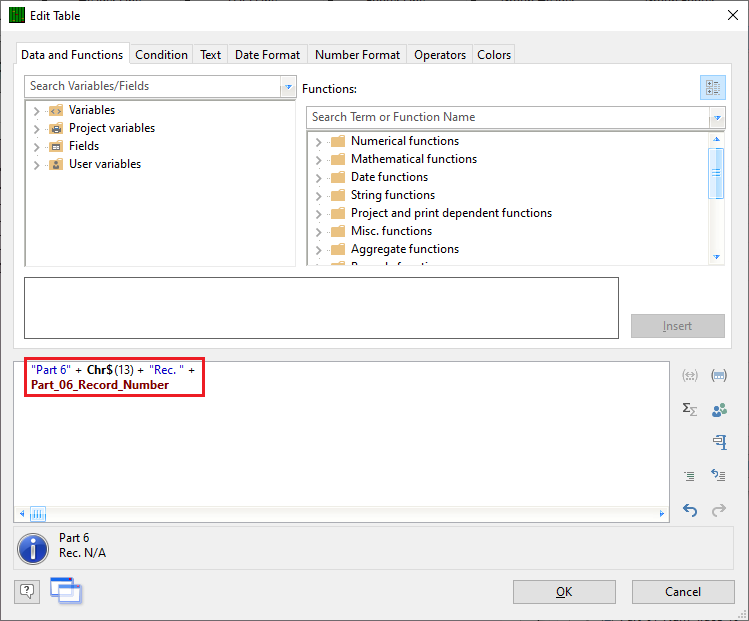
- You now have 2 “if(Used_Part_05…” lines showing in the Table Contents window. Click on the bottom instance of that line and click the Edit line button.
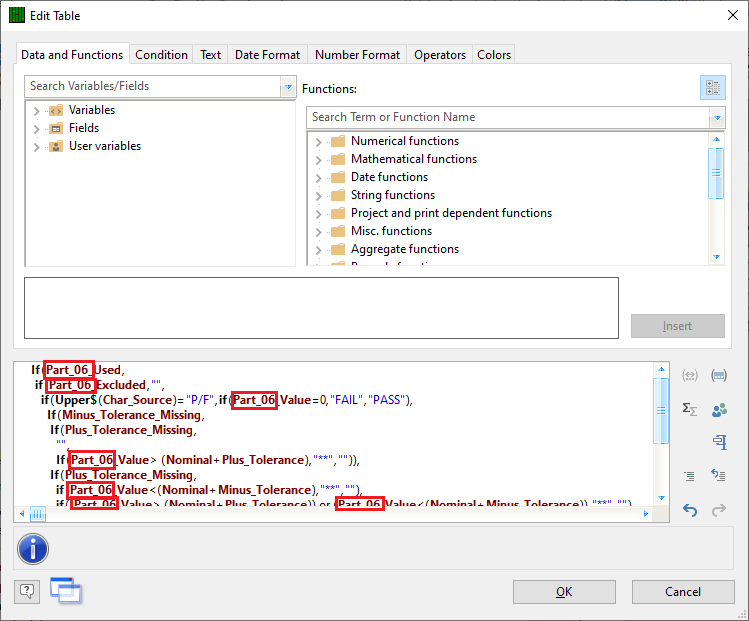
- Now go through the entire block of commands in the bottom section of the Edit Table window, change all instances of “Part_05” to “Part_06”, and click OK.
New Column Header
- In the Table Contents window, choose the Header Line tab.
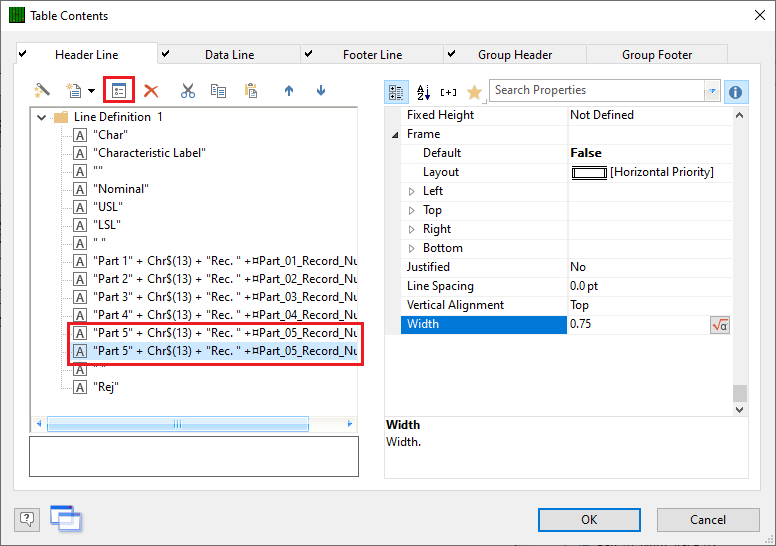
- Highlight the “Part 5…” line, then click the Copy line to Clipboard button followed by the Insert line(s) from Clipboard button.
- You now have 2 “Part 5…” lines showing in the Table Contents window. Click on the bottom instance of that line and click the Edit line button.
- Now go through the entire block of commands in the bottom section of the Edit Table window, change all instances of “Part_05” to “Part_06”, and click OK.
Final Steps
- Click OK on the Table Contents screen and save your changes (File > Save).
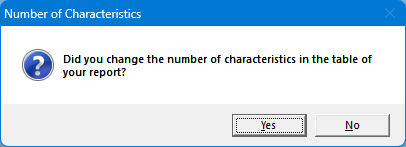
- Exit from the Report Designer. You will see a question asking if you changed the number of parts in your report. Choose Yes on this message.
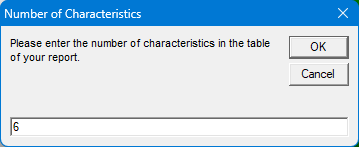
- The next window that appears will be asking for the total number of parts now represented in this report. Answer this question with “6” for your report to run correctly in the future.
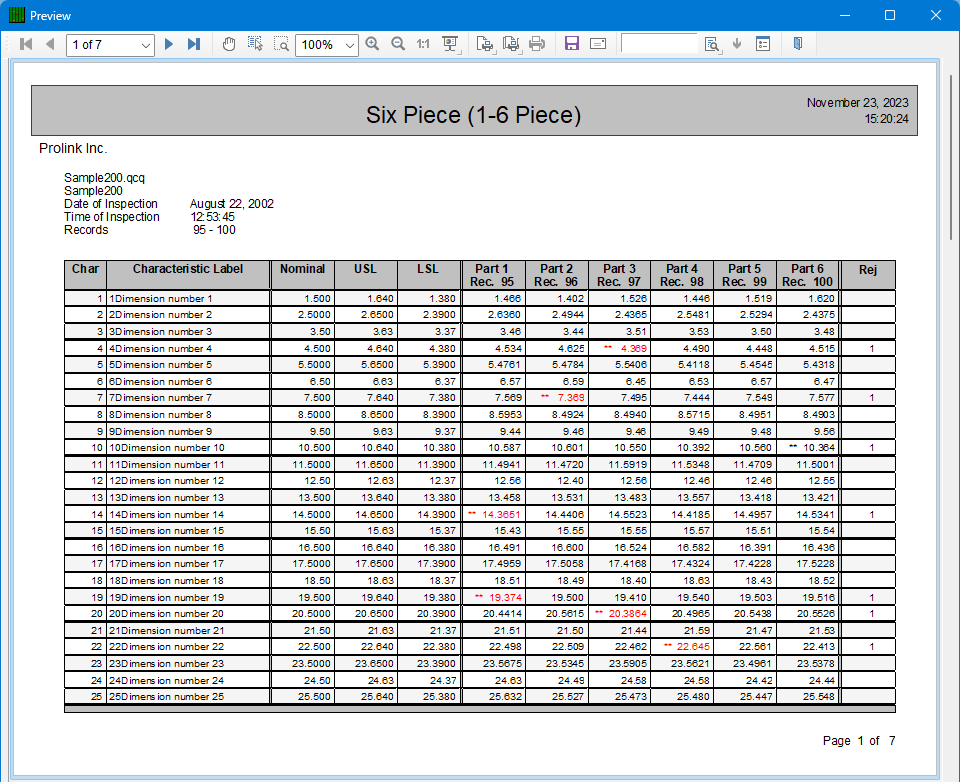
- Now run your report and you should have a 6th column of parts.