Setting up specific Text and Numeric Factor locations within .qcc files will help you with your reporting requirements as time progresses. If you want the same information to appear in the same location on reports from .qcc file to .qcc file or you want to create Excel Jobs with SPC Office Buddy, having the same factor information in the same location from one .qcc file to the next this is the solution. With this in mind a way of specifying Factor Labels for each location as a new .qcc file is created was added.
The Tools - Options - File Creation Defaults - Factors area is used to set up Factor Labels in specific locations in every new file that is created. This means, regardless of any factor location instructions received in the communication file from the inspection machine, if the Factor Label matches one of the labels in the File Creation Defaults area, the value will be stored in the location specified by that label. This will make it so that all new .qcc files are using the same location for each factor and, even if the value isn’t being sent over from the inspection machine, there will still be space saved in the .qcc file for that value to be added to the part routine later.
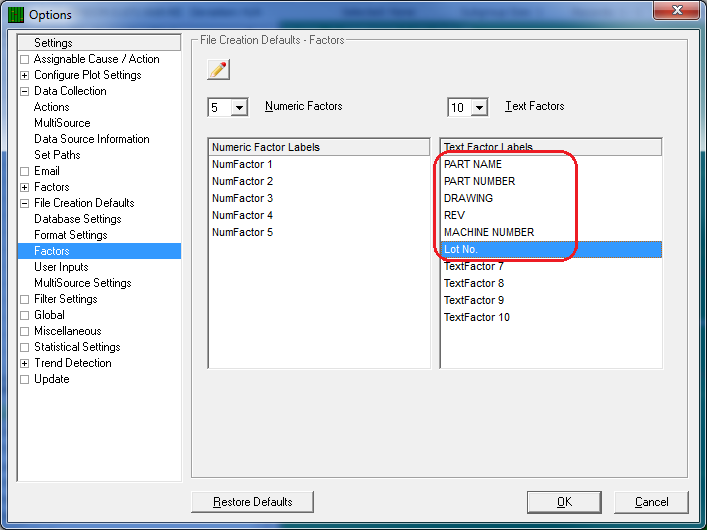
If you go into Tools – Options – File Creation Defaults – Factors you’ll see the screen below. Double-click on "TextFactor 1" thru "TextFactor 6" in the right column and change the labels as shown below. Now, as long as you send in those labels, any Text Factor that comes in with “Rev” as the label will automatically end up with the value being stored in the Text Factor 4 location. This means the "Rev" value will always come out in the same spot on a report and will be available in the Text Factor 4 values used within SPC Office Buddy Excel Jobs too.