One of the default Raw Data reports that ships with ERS has a column for Text Factor 1 in the table. This White Paper will give step-by-step instructions for designing your own custom template and changing the Text Factor 1 value in the table to Numeric Factor 1.
Identifying the Factor Location
In QC-CALC Real-Time, the data collection process assigns the factors to a specific location within the database and that location (there are locations 1 – 30 for Text Factors and also 1 – 30 for Numeric Factors) is used to reference those values everywhere within QC-CALC, QC-Gage, and SPC Office Buddy. The majority of ERS just shows the Factor Labels and no mention is made of the actual Factor Location. When it comes to the reports, those Factor Locations come back into play. Before the rest of the directions can be followed you will need to learn where the Factors you want to display are being stored. If you already know where your factors are stored based on the locations within QC-CALC, skip to The Report Designer section.
- From the Data View tab in ERS choose the Numeric Factors tab in the Grid Display Peroperties area in the bottom left corner of the screen.
- Find the Numeric Factor you want to add to your report and count from the top to find the corresponding number.
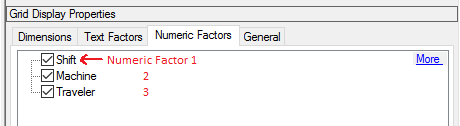
- Write down the number of any of the Factors you will be adding to your report. For these directions “Shift” (Numeric Factor 1) will be used.
- Follow the same directions on the Text Factors tab for any Text Factors.
The Report Designer
The directions shown here will change the Text Factor 1 column to Numeric Factor 1 (Shift) in the table. This is a lengthy process, but relatively simple to accomplish.
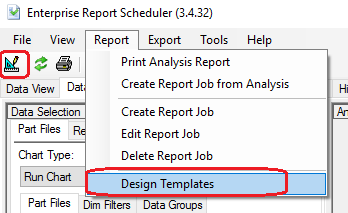
- From ERS, choose the Report – Design Templates menu or the corresponding button in the Toolbar (circled in the picture below), then choose the “Raw Data Report (*.raw)” item in the lower right corner of the next screen that appears to narrow down the choices to just the Raw Data templates.
- Make a copy of the “RawDataReportLand_SinglePart_TF1+Date.raw” file, give it a name that makes sense, highlight that new file in the list of files, and click Open.
- The Report Designer now appears on the screen.
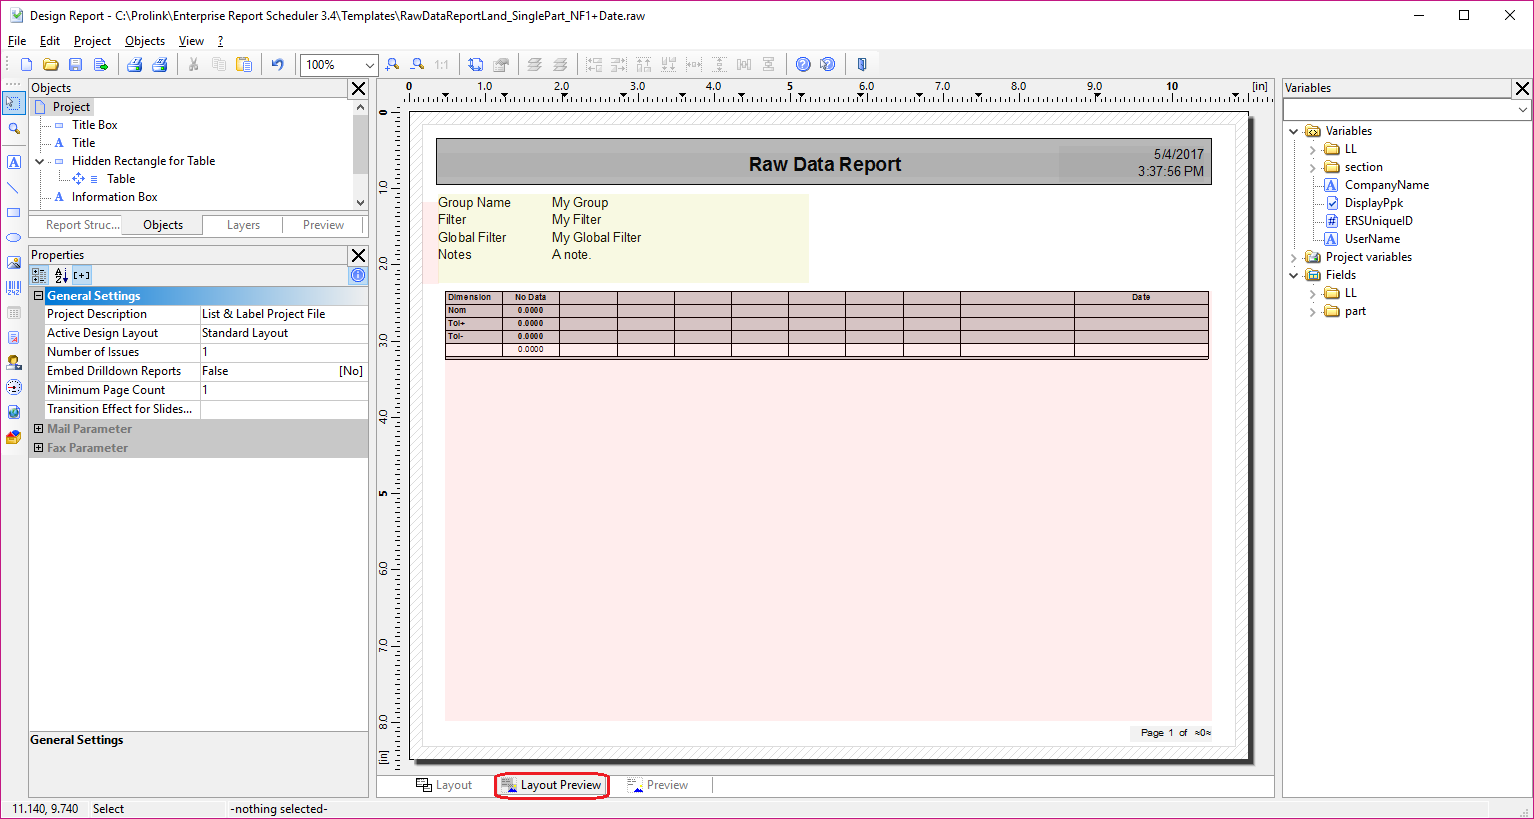
- The big pink box in the middle of the screen (if you are on the Layout Preview tab as shown above) is the table. Double-click there and the Table Contents window will appear.
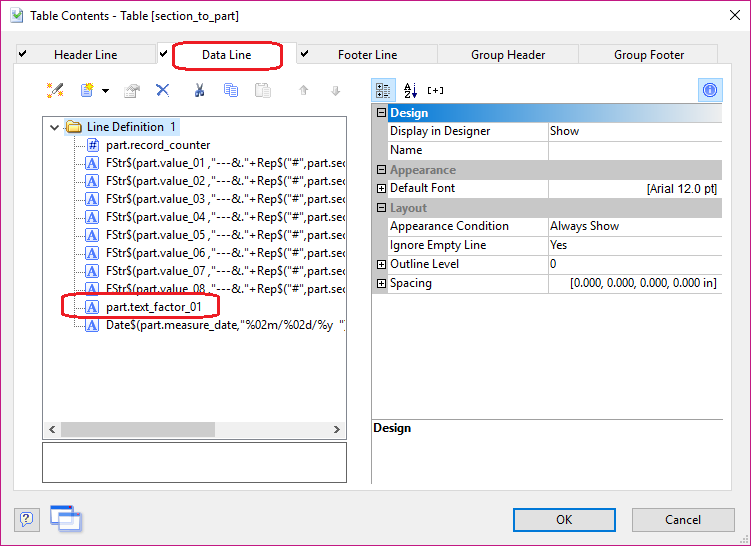
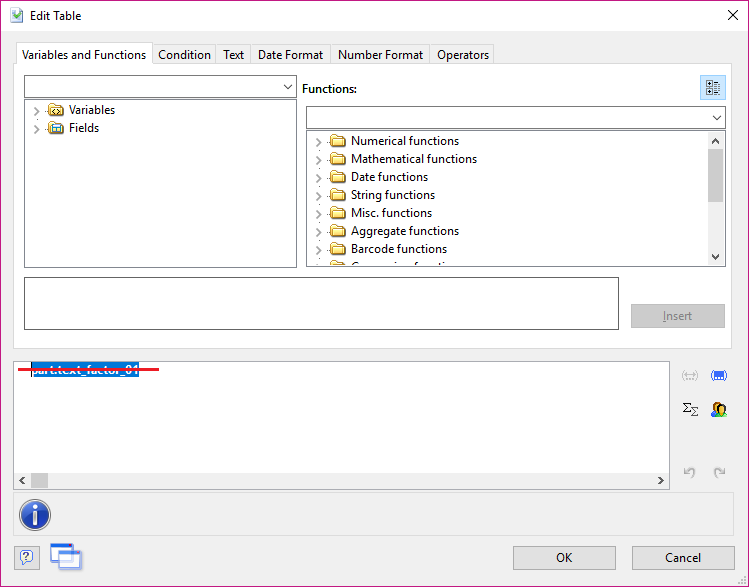
- From the Data Line tab, double-click on the “part.text_factor_01” item.
- In the Edit Table window that appears, delete the “part.text_factor_01” from the box at the bottom of the screen.
- Because a Numeric Factor value is a number and the Report Designer wants text, we need to give instructions for how to format the number as text. To format the Numeric Factor, open the Numerical functions section on the right side of the Variables and Functions tab, highlight the “FStr$” item, and click the Insert button (you can also double-click the “FStr$” item to insert it).
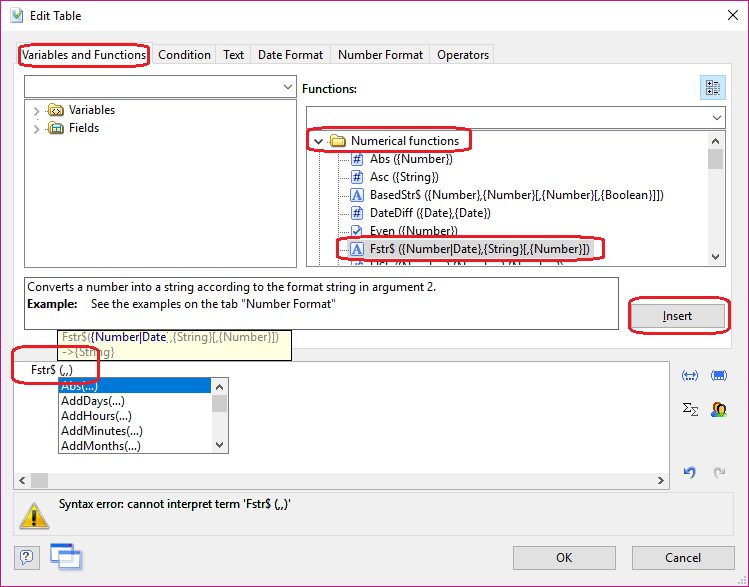
- This will add the “FStr$” function to the line and leave the cursor exactly where we need it to be.
- Back in the Variables and Functions area open up the Fields > part area by clicking the >. Do NOT use the section area for this.
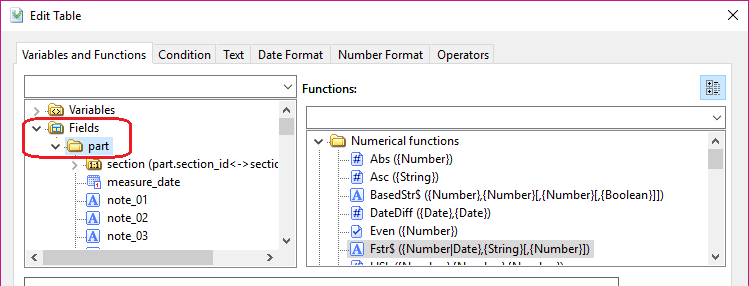
- Scroll down until you find the “num_factor_01” item in the list and click the Insert button.
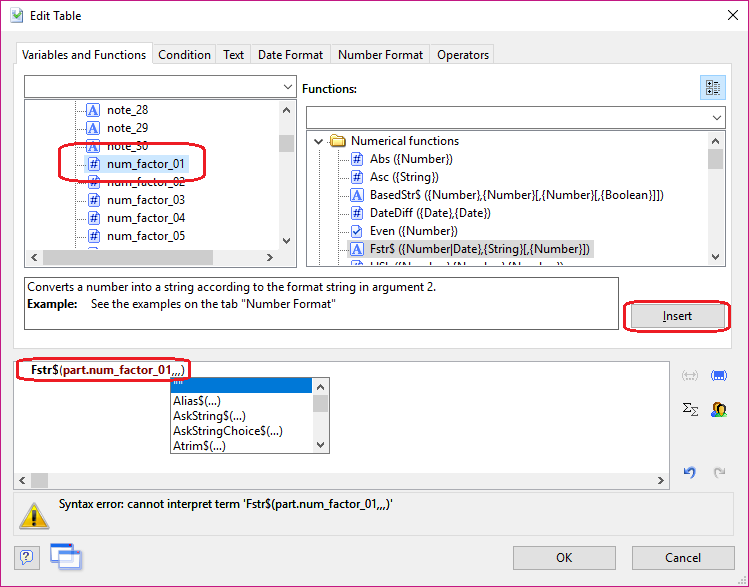
- At this point you will see a “Syntax error” at the bottom of the screen. Ignore that for now as it should be resolved in the next few steps.
- Next, move the cursor over 1 place (so it is on the right side of that next comma) and start typing the following (including the “): “######&”
- QC-CALC is only able store 7 digits, so there are enough places represented to hold a value that QC-CALC collected. If your number is not a whole number, then you can also add a decimal point and more # to the right to hold those characters. The & tells the report to print a 0 in that place if no value was received. The # will suppress leading 0s, so using all & should be done if you want a number like “002036” to be printed vs. “2036”. If you can have negative numbers replace all of the # with – (“------&” for example).
- Delete the remaining comma from the line and the error at the bottom of the screen should go away. The formula for this line should be:
Fstr$(part.num_factor_01,"######&")
- Click OK on the Edit Table window.
- Now that the data area of the table will show the Numeric Factor values, the Label needs to be adjusted to match. Back in the Table Contents window, click on the Header Line tab and go to the “Line Definition 2” area (which starts with the “Dimension” line).
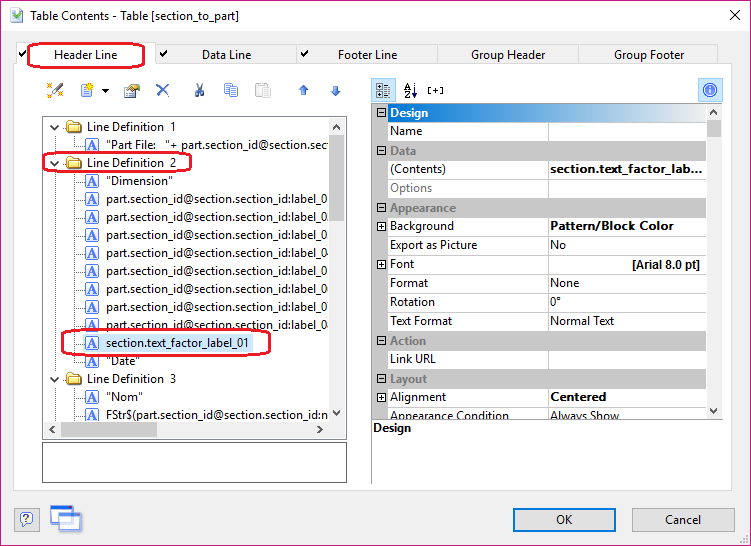
- Double-click the “section.text_factor_label_01” line right above the “Date” and the Edit Table window will appear again.
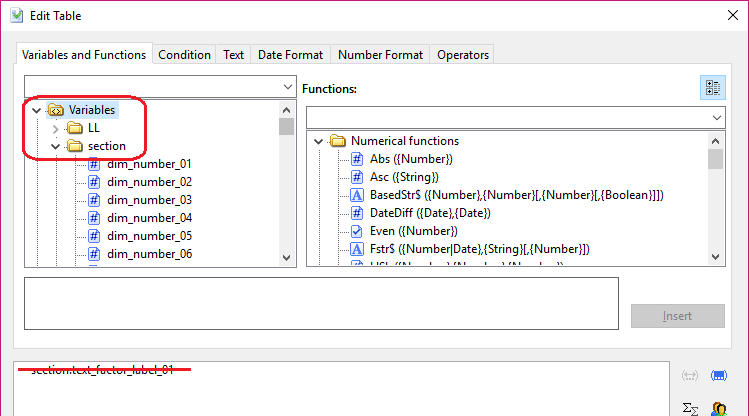
- Delete the line in the box at the bottom (the old Text Factor Label), then open up the Variables > section area by clicking the >.
- Scroll down until you find the “num_factor_01” item in the list and click the Insert button.
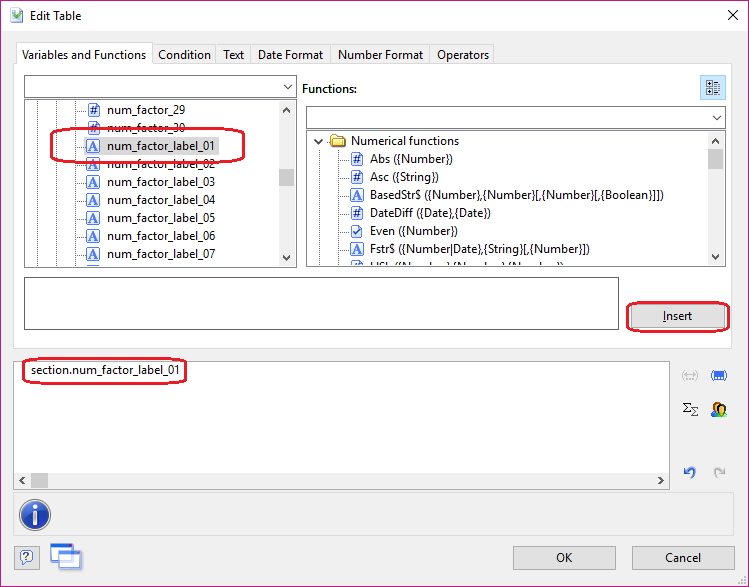
- Click OK on the Edit Table and Table Contents windows.
- Click File – Save and then File – Exit to get out of the Report Designer.
- Now run your Raw Data report using the template you just changed and you should see the Numeric Factor data you wanted.