The Stat Summary report that comes with ERS only displays columns for some statistical values, but other values can also be displayed. This White Paper will give step-by-step instructions for designing your own custom template and changing the “Sigma” and “Sigma R” columns to show the “Cp Lower” and “Cp Upper” values instead.
The Report Designer
The directions shown here will change the “Sigma” and “Sigma R” columns to show “Cp Upper” and “Cp Lower” instead. This is a lengthy process, but relatively simple to accomplish.
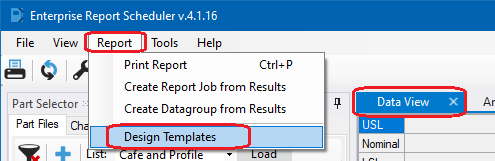
- While using the Data View or Analysis tabs in ERS, choose the Report > Design Templates menu.
- In the Open window that appears, choose “Statistics Summary (*.sts)” in the list in the lower right corner of the screen, then right click on the “StatisticalSummary.sts”, choose Copy, right click in empty space in the file area, and choose Paste.
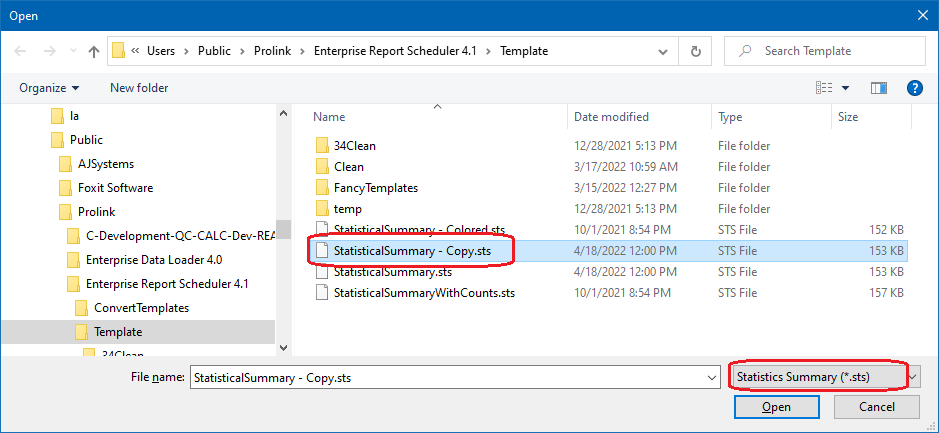
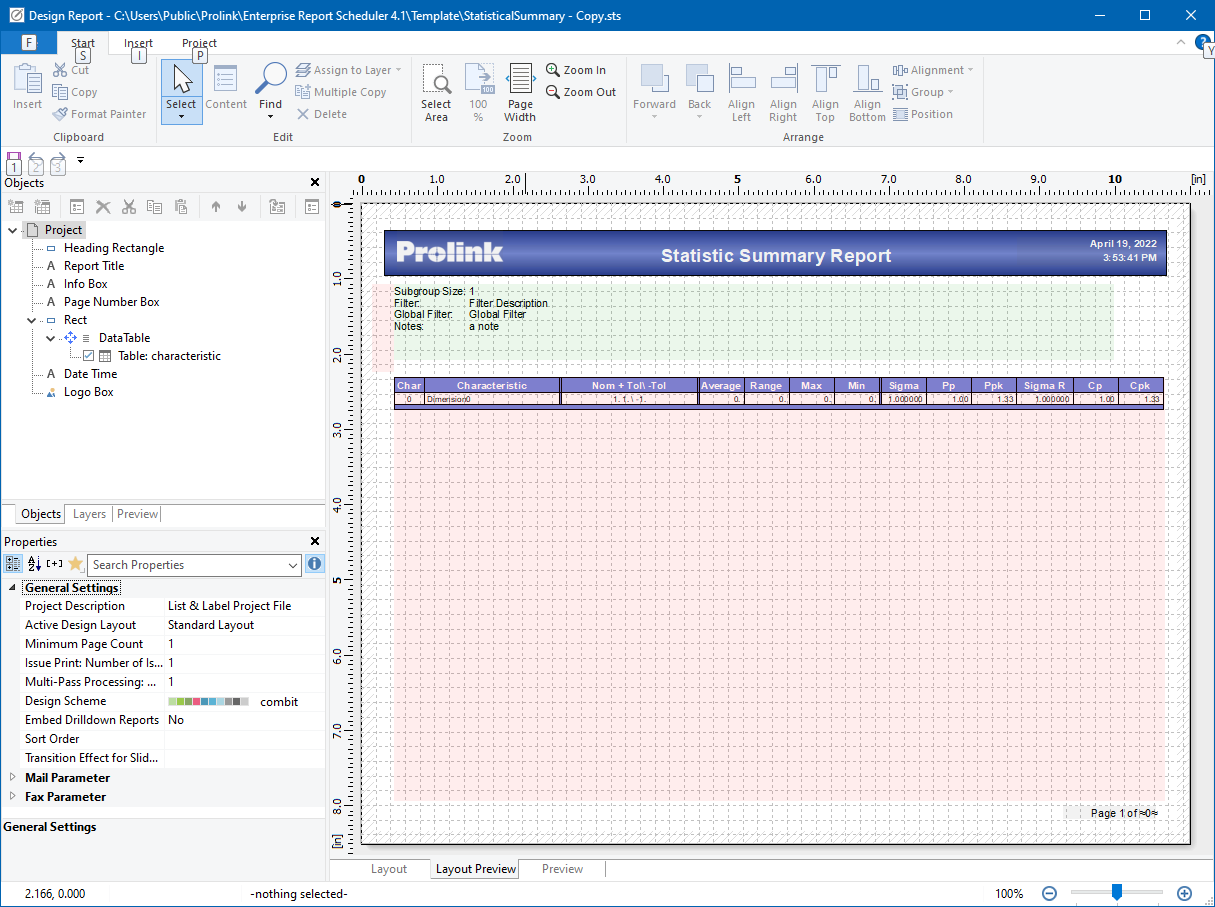
- The previous step will create a “StatisticalSummary - Copy.sts” file. Choose that file, then click the Open button at the bottom of the window and the Report Designer window will open.
Header Lines
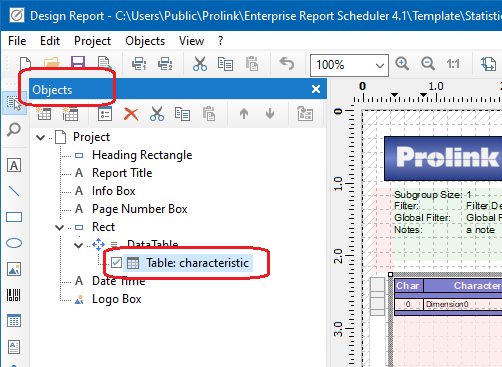
- Use the Objects area in the upper left to find the “Table: characteristic” line, then double click that item and the Table Contents window will appear.
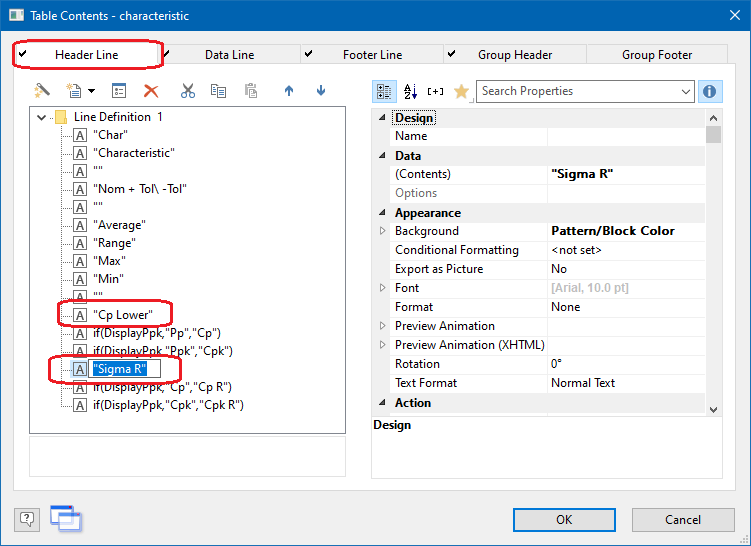
- On the Header Line tab in the Table Contents window, right click on the “Sigma” line on the left, choose Rename Column to edit that value, and enter “Cp Lower” as the new column heading value. Repeat this process for the “Sigma R” item and enter “Cp Upper” as the new value.
Data Lines
Now that you’ve fixed the column headings, The next step is to change the values that will appear in the columns below those headings by using the Data Line tab on the Table Contents window.
- Before doing any actual changing, you need to copy an existing line because it is very close to the format of the formulas that need to be created. The easiest way to accomplish this is to copy the “if(characteristic.cp <> …” line directly below the “sigma_within” line in the Table Contents screen.
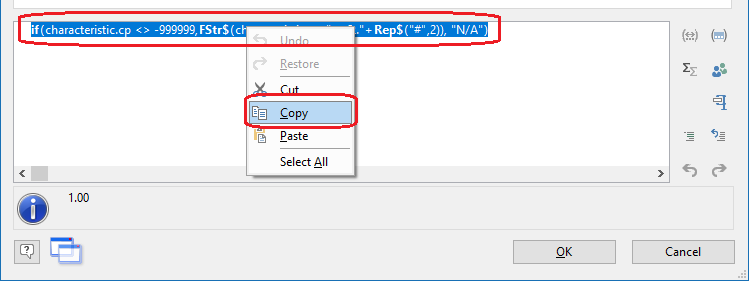
- Locate and double-click the “if(characteristic.cp <> …” line, then highlight and copy (CTRL + C) the line that shows in the bottom box in the Edit Table window. For the moment, bring up Notepad and paste (CTRL + V) the formula into an empty file.
- Back in the Table Contents window, On the Data Line tab, double-click the line that starts with “FStr$(characteristic.sigma_overall” and the Edit Table screen appears.
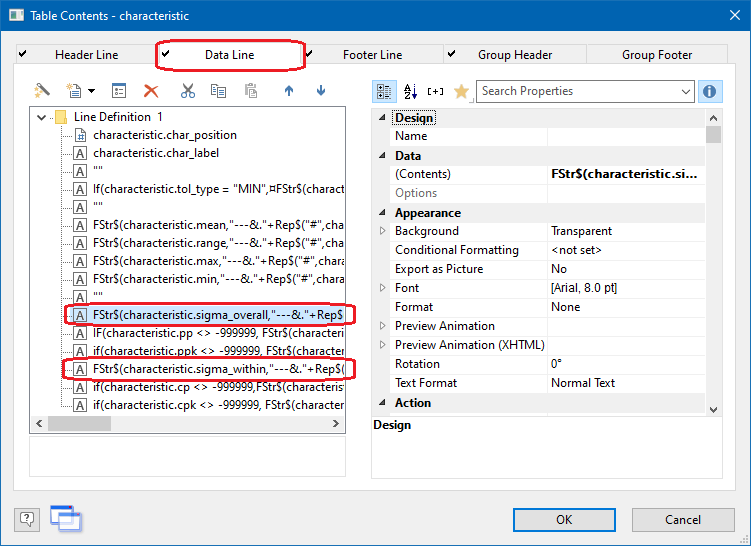
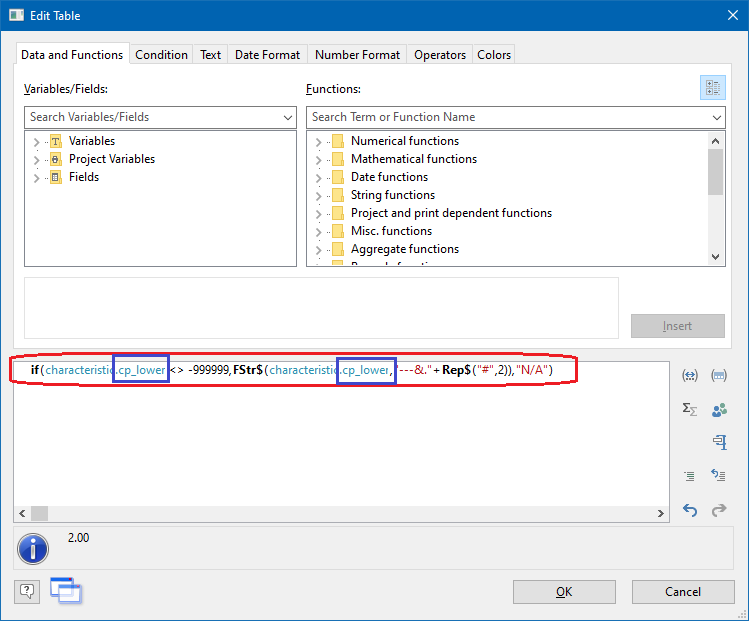
- In the Edit Table screen the line showing at the bottom of the screen needs to be changed to show the Cp Lower values. The line copied in step 1 was the formula for the Cp values, so the field name being used within the copied formula just needs to be adjusted slightly. Delete the line circled in the picture below, then paste in the line from step 1.
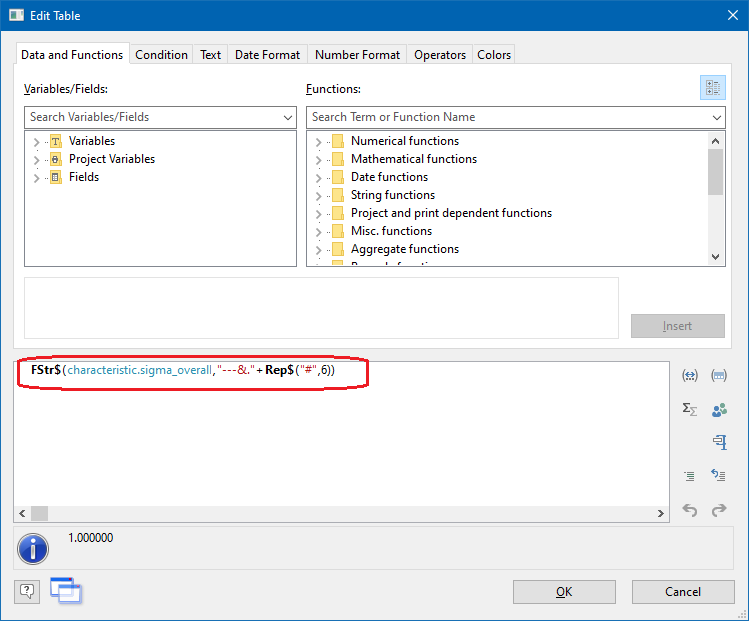
- The formula needs to be changed so that “characteristic.cp” becomes “characteristic.cp_lower”. The new field names are shown in blue in the line and picture below.
if(characteristic.cp_lower <> -999999,FStr$(characteristic.cp_lower,"---."+Rep$("#",2)),"N/A")
- Click OK on the Edit Table window to accept the changes you made.
- Now that “Sigma” has been changed to “Cp Lower”, the same operation needs to be done to change the “Sigma R” column to “Cp Upper”.
- Repeat steps 3 through 6 with the following changes:
- In Step 3, double-click the “FStr$(characteristic.sigma_within” line.
- In Step 4 we’re going to be adjusting this to be the Cp Upper values.
- In Step 5, the “characteristic.cp” becomes “characteristic.cp_upper” as shown in the formula below.
if(characteristic.cp_upper <> -999999,FStr$(characteristic.cp_upper,"---."+Rep$("#",2)),"N/A")
- Click the OK button on the Edit Table screen.
Reordering the Columns
At this point the process is almost finished, but the order of the columns is a little off. This section will fix that so the column order makes sense again.
- As you can see in the picture of the Table Contents screen below, currently the Cp Lower is not located near the Cp Upper and Cp columns (rows in the window). We are going to reorder the items in this screen so that the order is Cp Lower, Cp, and Cp Upper instead.
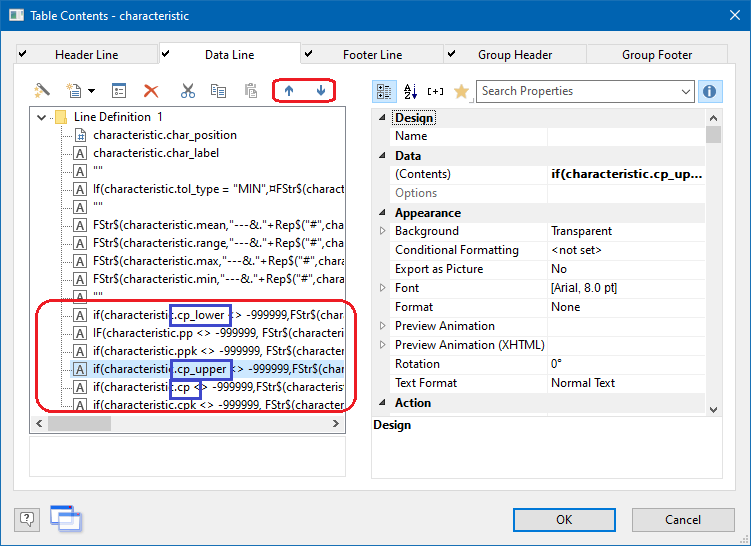
- Click on the cp_lower line, then use the down arrow button (circled at the top of the picture above) until that line appears directly above the cp_upper line.
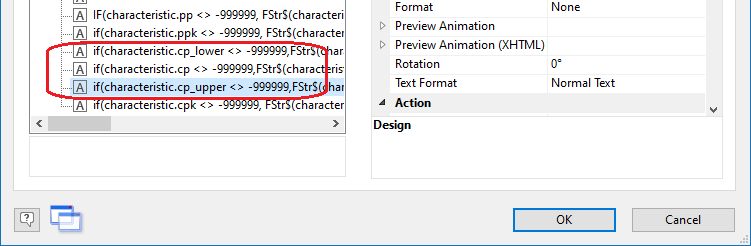
- Click on the cp_upper line and use the down arrow button until it appears immediately after the cp line. This is what it should look like when you are done:
- Now that the data columns are in the correct order, we need to do the same process for the headers.
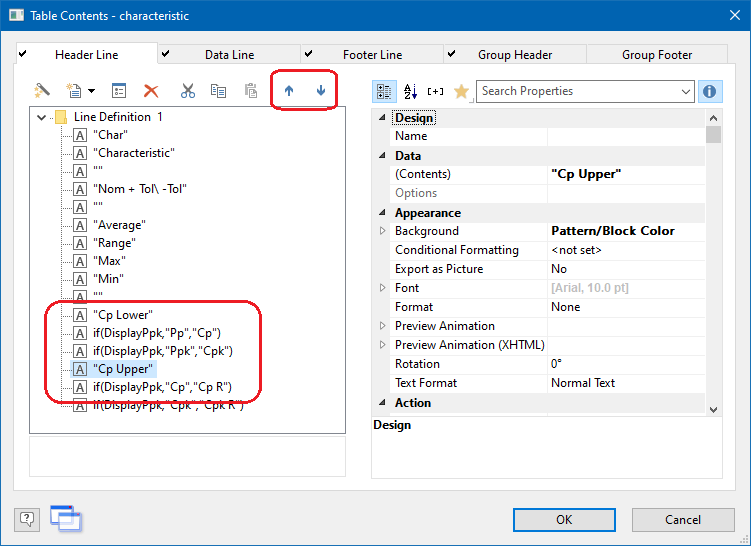
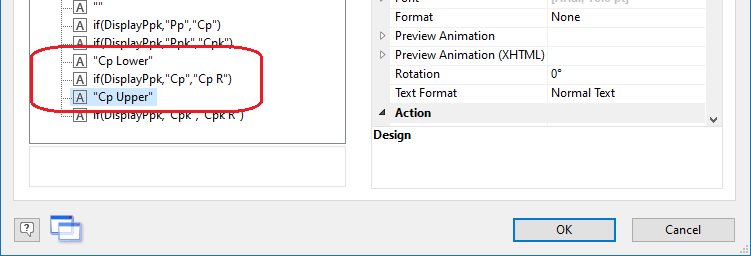
- Change to the Header Line tab, click on the “Cp Lower” line and use the down arrow to move it just above the “Cp Upper” line.
- Click on the “Cp Upper” line and move it just below the line directly below it (ends with “Cp R”). This is how it should look when you are done:
- Click OK to on the Table Contents window, then use the File > Save menu to save your changes.
- When you run your report, you will now have the “Cp Lower” and “Cp Upper” columns appearing.