INTRODUCTION
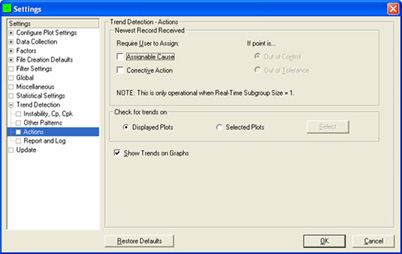
When trends do occur, you can have QC-CALC take some action such as assign a cause or corrective action. A window will popup and ask you to assign a Cause before continuing to collect data from your CMM. This option checks each new record that is received to see if it meets the criteria that you set. If the point is outside the 3 Sigma Limits, Control Limits, or Specification Limits you can require your operators to set an assignable cause and/or a corrective action for that record.
Dimensions to check for trends
With this you have the option of monitoring all displayed dimensions for the trends
you have chosen, or choosing specific dimensions to monitor instead.
Show Trends on Graphs
This option must be checked if you want the trends to be displayed on the plots. The trends are displayed as thick data lines.
STEPS
- Choose Tools ?/ Options.
- Expand list on left to the Trend Detection > Actions group.
- Specify the actions you would like the software to perform when a trend is detected.
- Optionally specify a Report and Log feature if desired.
- Click OK to save changes when finished all changes.
- Check the Tools > Trend Detection menu to turn on the Trend Detection functionality in general.