INTRODUCTION
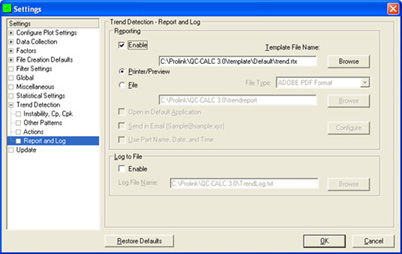
Checking the Reporting > Enable option tells QC-CALC to print/email a report every time a trend is detected in the data received during the collection process. You may also optionally log the trend to a text file.
STEPS
- Choose Tools > Options.
- Expand list on left to the Trend Detection > Report and Log group.
- Specify either Reporting > Enable and/or Log to File > Enable.
For Reporting... - Specify either Printer/Preview or File.
If File was chosen... - Specify the path to the exported file. You can optionally use the Browse button to navigate to the directory where the file will be saved.
- Check Open in Default Application to open the file after export in its associated application (i.e. PDF will open in Adobe Acrobat).
- Check Send in Email to send the file after export. Click Configure to set email options.
- For Log to File...
- Choose the path to which the file will be logged. The format is standard as shown below.
When the Log to File option is Enabled (checked), QC-CALC writes a trend description to the trend log file. To choose the file name type the file name in the box provided or click the Browse button and choose the file name using the dialog box that appears.
The log file includes: - Name of the trend, dimension number
- Record range, time and date
- File Name, part name
- Trend configuration
- Click OK to save changes when finished all changes.
- Check the Tools - Trend Detection menu to turn on the Trend Detection functionality in general.