Step 1 – Correct QC-Gage and QC-CALC Versions
The AQL functionality was added within the 4.0 versions of both QC-Gage and QC-CALC. In order to use this functionality you must be using at least QC-Gage 4.0.41 and QC-CALC Real-Time 4.0.73. If QC-CALC Real-Time is not at this revision level it will NOT collect data from a QC-Gage revision that is at this level.
Step 2 – Sharing AQL Tables
When using the AQL functionality both QC-Gage and QC-CALC need to have access to the same AQL tables. This means different things based on the Data Storage method being used at your company. Both options are described below.
File Based (QCQ Files) Mode
When using QCQ files any common settings (like Record Filters) are stored in the global.dat file, but if QC-Gage and QC-CALC are using different global.dat files the settings will not be shared between the applications. With multiple computers running these applications, it is recommended that the global.dat file be saved to a server location and ALL copies of Prolink applications be adjusted to use that file.
QC-CALC Real-Time:
In QC-CALC Real-Time the Global.dat file location is set in the Tools > Options > Filters area as shown below. Either make note of the Filter File setting so the same setting can be used within QC-Gage or choose a new location on a server. If you decide to use a new location, click the Create button, choose the server location, and enter a file name. We recommend using “Global.dat” as the file name.
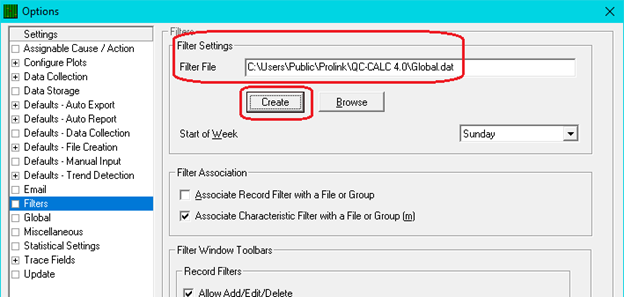
NOTE: This setting will be moved to the Tools > Options > Data Storage area in a future release.
QC-Gage:
In QC-Gage the Global.dat file location is set in the Tools > Options > Data Storage area as shown below. The Global Dat File setting needs to match what was set as the Filter File in QC-CALC Real-Time in the previous step.
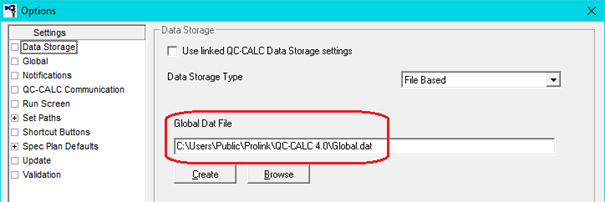
NOTE: An option to automatically use the setting from within QC-CALC Real-Time will be added in a future release. Just checking that option will do everything you need at that point.
SQL Server Mode
When using SQL Server any common settings (like Record Filters) are stored in the database, so if QC-CALC Real-Time and QC-Gage are using the same SQL database the AQL tables will be shared automatically. With multiple computers running these applications, it is recommended ALL Prolink applications be adjusted to use that same SQL database.
QC-CALC Real-Time:
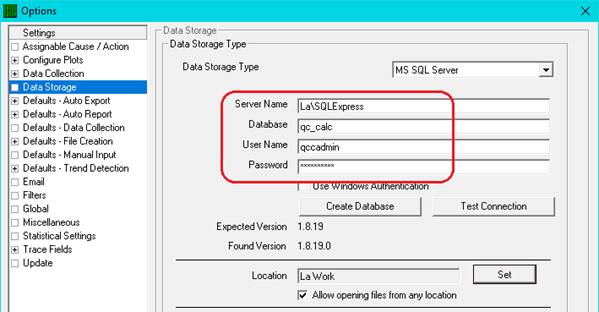
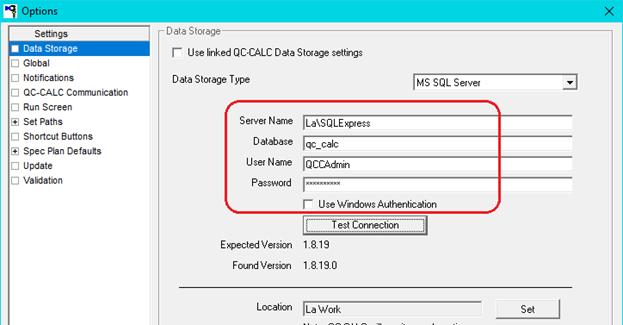
In QC-CALC Real-Time, verify the SQL database being used in the Tools > Options > Data Storage area as shown below.
QC-Gage:
In QC-Gage verify the same database as shown in in the previous step is set in the Tools > Options > Data Storage area.
Step 3 – Add AQL Lookup Tables
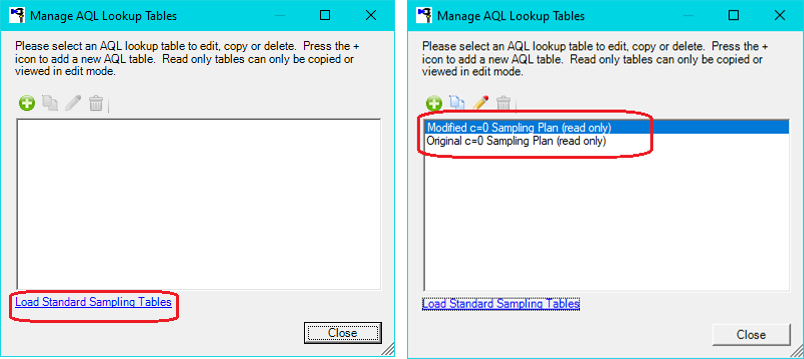
Prior to adding any AQL characteristics to a spec plan, the AQL Lookup Tables must be created. To do this go to the Tools > Edit AQL Lookup Tables menu and click the Load Standard Sampling Tables link at the bottom of the Manage AQL Lookup Tables screen. The picture below on the right shows the 2 tables that are created for you to use.
Step 4 – Using AQL Levels in Spec Plans
Now that you have setup the AQL Level tables, you are able to use the AQL functionality in a Spec Plan. Create a new spec plan (File > New Spec Plan) and in the Data Type screen the “Use AQL Levels” option will now be shown in the Number Of Parts box.

The next setting you need to choose is the AQL Mode.
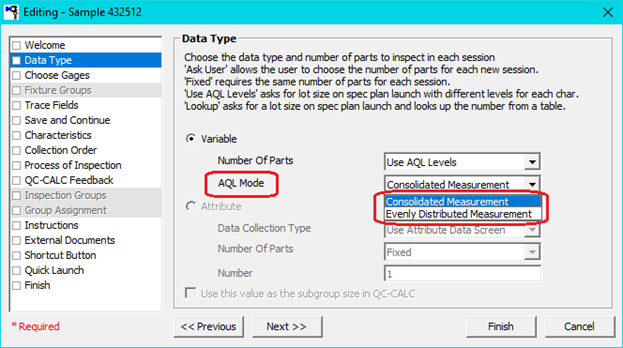
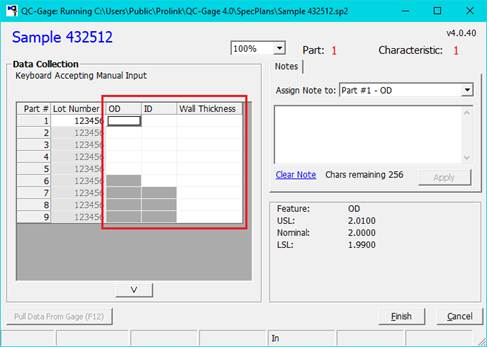
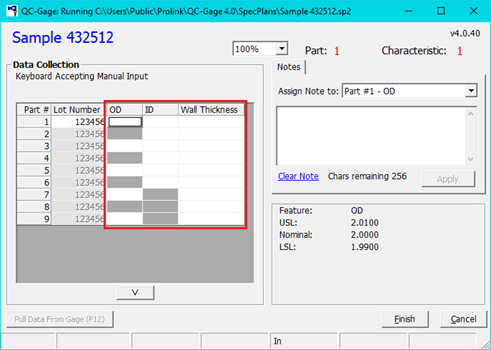
“Consolidated Measurement” will group all of the data entry points together in the grid. As you can see in the picture below, using the AQL levels “OD” has 5 measurements required, “ID” has 6, and “Wall Thickness” has 9 based on the 100 part lot size that was entered. The consolidation of the measurements filled the bottom of the grid with gray boxes where values cannot be entered.
Using “Evenly Distributed Measurement” spreads the gray boxes throughout the columns as shown below.
Step 5 – Applying Table and Percentages to Characteristics
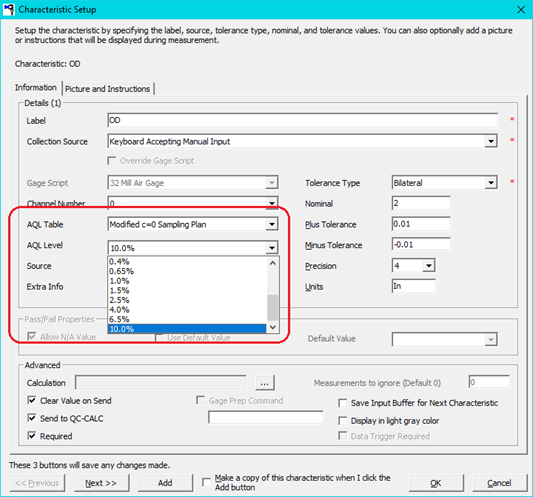
The last remaining step to using AQL levels is to choose the AQL table and percentage to use for each characteristic in your spec plan. In addition to the normal items that need to be entered/changed, choose the AQL Table and AQL Level you want to use for each characteristic as shown for the “OD” characteristic in the picture below.
Step 6 – Run the Spec Plan
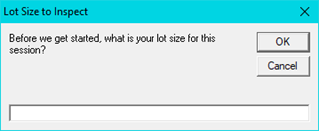
It is now time to run your spec plan. You will be prompted to enter the Lot Size at the beginning of each run.