The default Raw Data report (DataStat.raw) supplied with QC-CALC shows the Pp and Ppk values in the calculations area. This White Paper will give step-by-step instructions for changing those rows to show Cp and Cpk instead.
Steps
The directions shown here will change the existing Pp and Ppk rows so they will show Cp and Cpk instead. This is a lengthy process, but relatively simple to accomplish.
- From QC-CALC Real-Time choose the Report > Design Template menu.

- Choose the DataStat.raw template from the list of files that appear and create a copy by right clicking and selecting copy.
- Paste the copy in the same area and click Open.
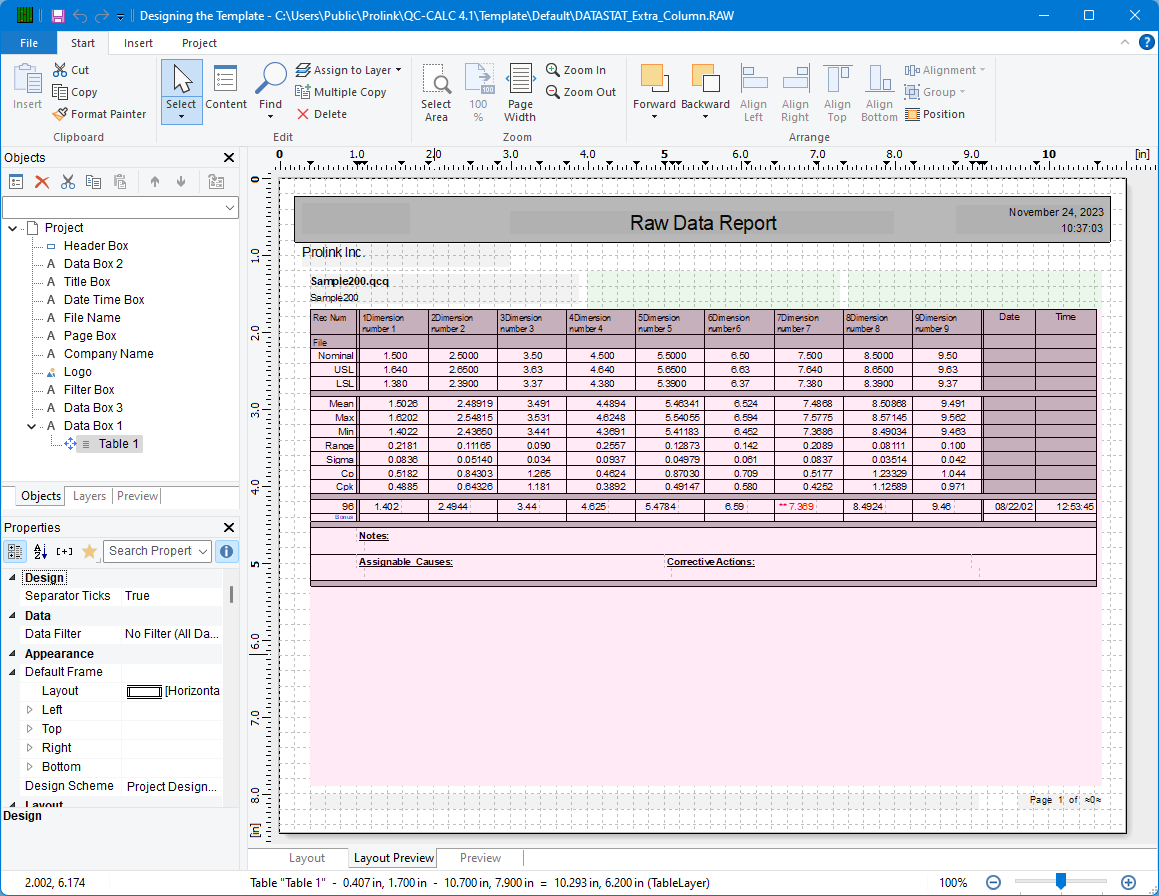
- The Report Designer now appears on the screen.
Change Pp to Cp
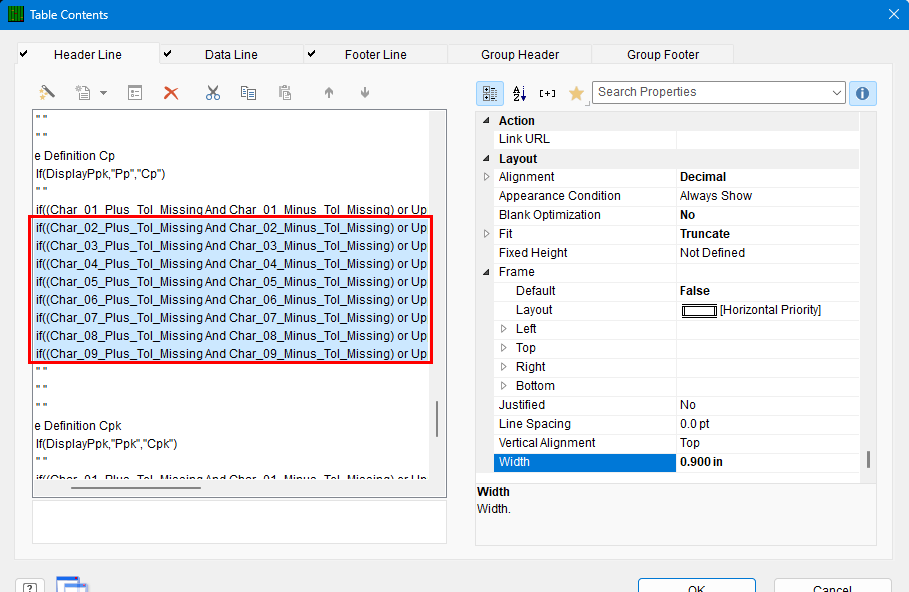
- Double-click on the table and the Table Contents window will appear.
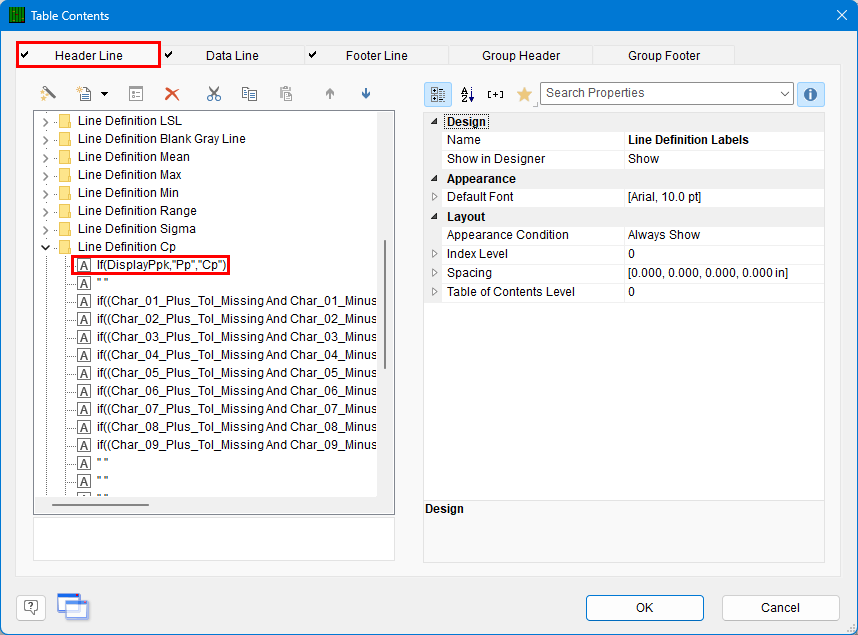
- Choose the Header Line tab then scroll down until you see the “Line Definition Cp” area. This area is actually showing the Pp value when you have the Tools > Options > Global > Show Ppk instead of Cpk option enabled, so don’t be confused by the words you’re seeing.
- Double-click the top line in that area so we can fix the label that will be displayed. In the Edit Table window that appears, change the line to read:
If(DisplayPpk,"Cp","Cp Within")
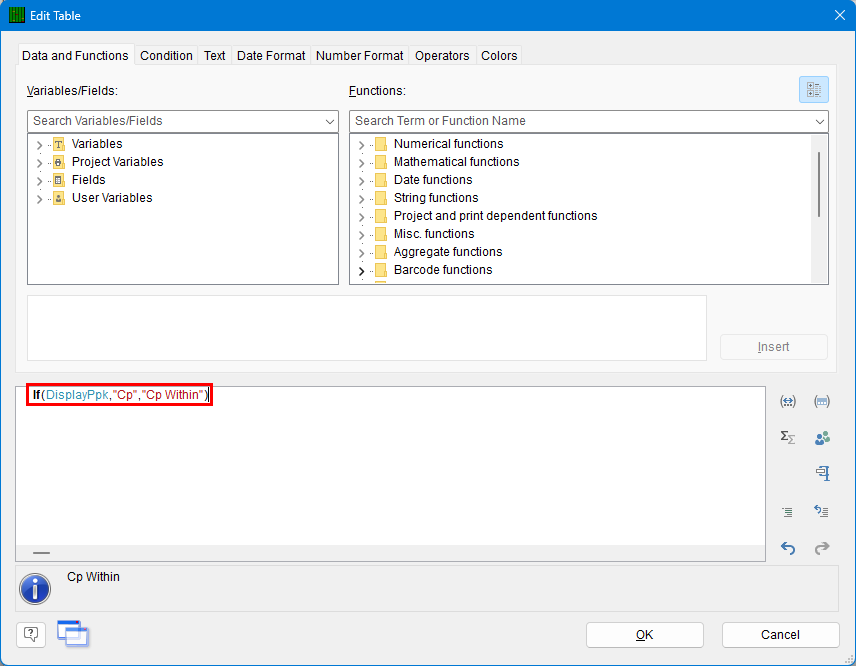
- Click OK in the Edit Table window.
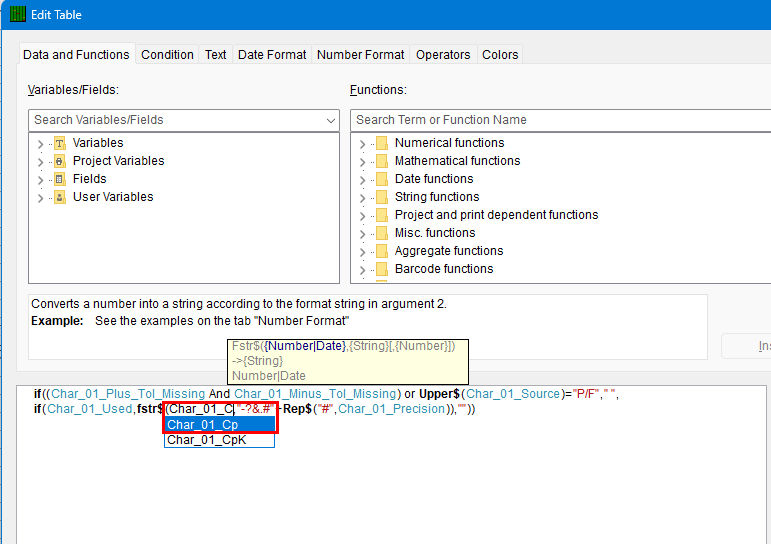
- Now that the label for the row has been changed, each column within the row needs to be updated too. To start, double-click the first line with words below the line you just fixed to bring up the Edit Table window for that item.
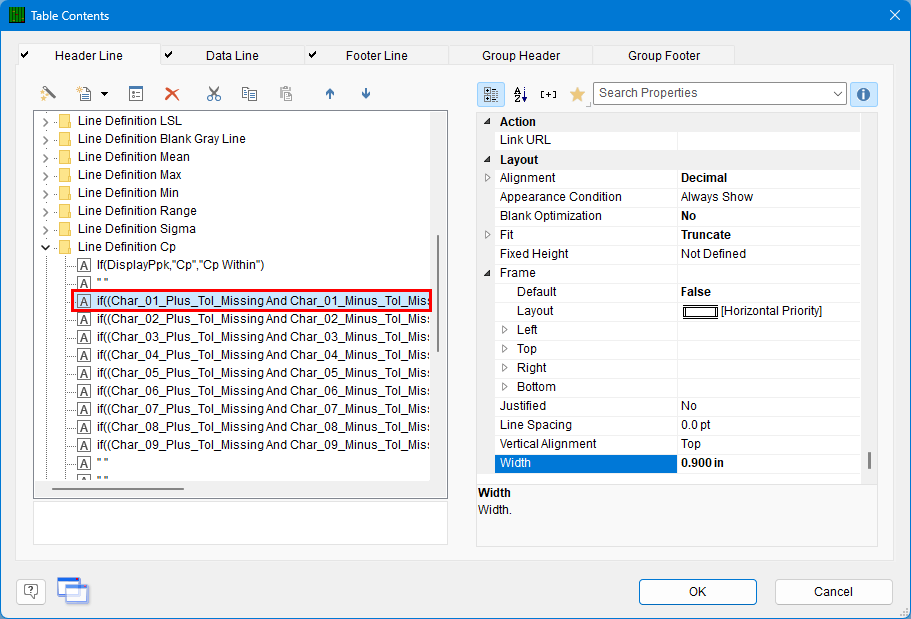
- In the box at the bottom of the screen, place the cursor immediately after the “Char_01_Pp” item and the list of available values will appear. Currently only the “Ppk” variable would be shown, so use the Backspace key to delete the “Pp” portion and an expanded list will be shown. Double-click on “Char_01_Cp” in the list and then click OK.
- Do the same procedure for the remaining characteristics in the “Line Definition Cp” section of the Header Line area.
Change Ppk to Cpk
Now that Pp has been changed to Cp the same process needs to be done for Ppk. To do this, find the “Line Definition Cpk” section (it should be directly below the Cp section) and do the same steps as above (steps 2 – 7). Here are the slight differences:
In Step 3: The text should be If(DisplayPpk,"Cpk","Cpk Within")
In Step 6: Double-click on “Char_01_CpK” in the list and then click OK.
Change Sigma to Sigma Within (optional)
Now that you are displaying the Cp/Cpk values the Sigma value being displayed is no longer the value used to calculate these values. It is probable that you would want to display the Sigma Within value that is used for those calculations instead. To do this, find the “Line Definition Sigma” section (it should be directly above the Cp section) and do the same steps as above (steps 2 – 7). Here are the slight differences:
In Step 3: The text should be Sigma Within
In Step 6: Double-click on “Char_01_Sigma_Within” in the list and then click OK.
General Steps
- Click OK on the Table Contents screen and save your changes (File > Save).
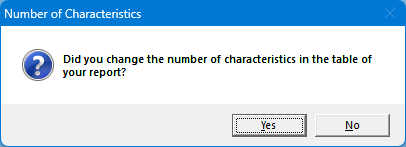
- Exit from the Report Designer and you will see a question asking if you changed the number of characteristics in your report. Choose No on this message.
- You are all set to run your report now.