PREREQUISITES
Install QC-CALC on the PC with Zeiss Calypso.
INTRODUCTION
This document gives a brief description of setting up Calypso to output the table files for QC-CALC. For a full description along with advanced options, please consult the Machine Specific Help in QC-CALC Real-Time by choosing Help > Machine Specific or pressing SHIFT+F1.
STEPS
- Install QC-CALC Real-Time and launch for the first time. On first run, it will auto-detect the presence of Calypso on the PC. Simply choose it and click Finish. QC-CALC is now ready.
- In Calypso, write a part program or open an existing program. Choose Resources > Results to File.
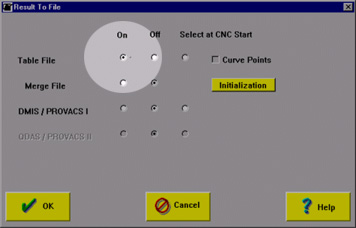
- On the Results to File Config screen, turn on the Table file by choosing the On radio button. Click OK when finished.
- Inspect your part. In the Results frame of the Start Measurement dialog, make sure to check the Table File checkbox and click OK.
- QC-CALC will automatically show the graphs when the part program is finished.
MORE INFORMATION
For more information, please consult the Machine Specific Help in QC-CALC Real-Time.