The Raw Data with Stats template shipped with QC-CALC only displays rows for some statistical values, but other values can also be displayed. This White Paper will give step-by-step instructions for designing a custom template and adding a row of Fail Counts to the standard Raw Data with Statistics template.
Steps
The directions shown here will add a row containing the Fail Counts into the report. This is a lengthy process, but relatively simple to accomplish.
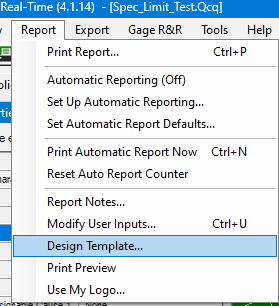
- From QC-CALC Real-Time choose the Report > Design Template menu.
- Choose the DataStat.raw template from the list of files that appears and click Open. The Report Designer now appears on the screen.

Header Lines
- Double click on the table and the Table Contents window will appear.
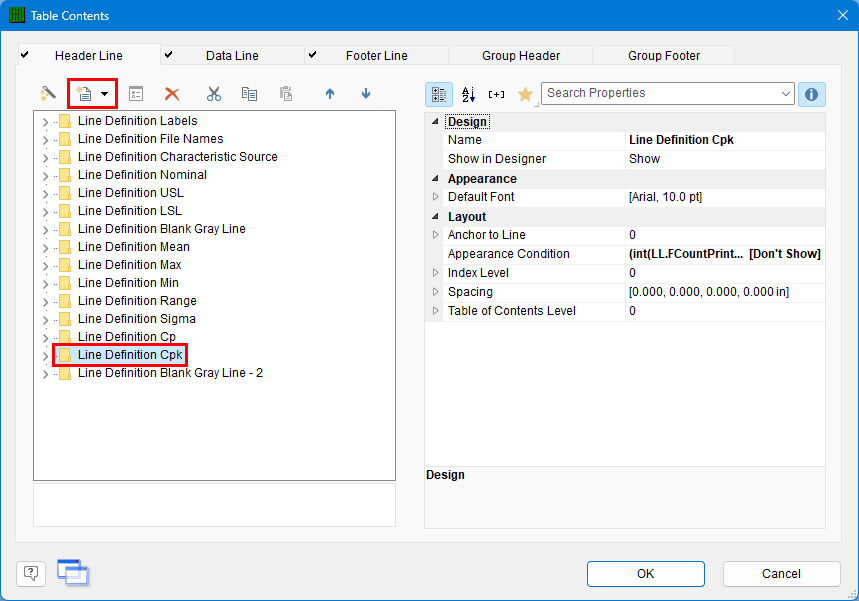
- Click the Minus (-) sign next to each Line Definition to make the list easier to deal with, then highlight the “Line Definition Cpk” line towards the bottom of the list.
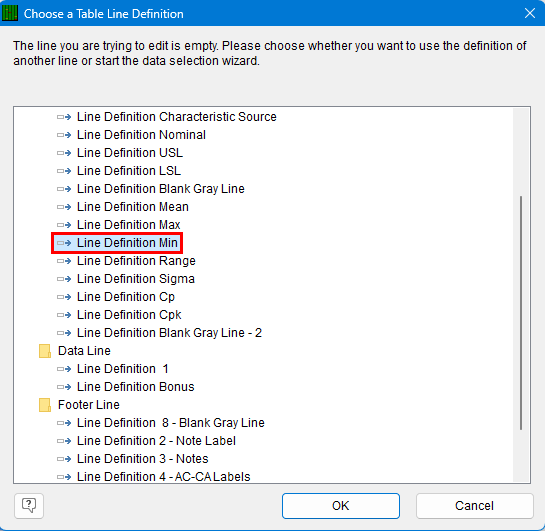
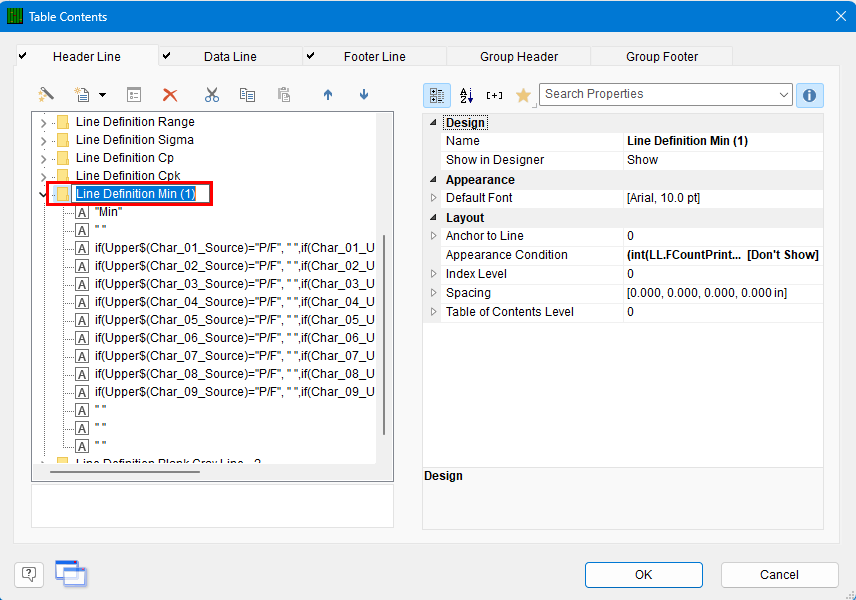
- Click the Append line definition button at the top of the Header Line area, then choose the “Line Definition Min” line in the next window. This gives you a good basis for the Fail Count line that will be added.
- You now have a new Header Line showing in the list, but the name needs to be fixed. Click on the “Line Definition Min (1)” item, then hit F2. Once the box appears around the words, change the description of that line to “Line Definition Fail Count”.
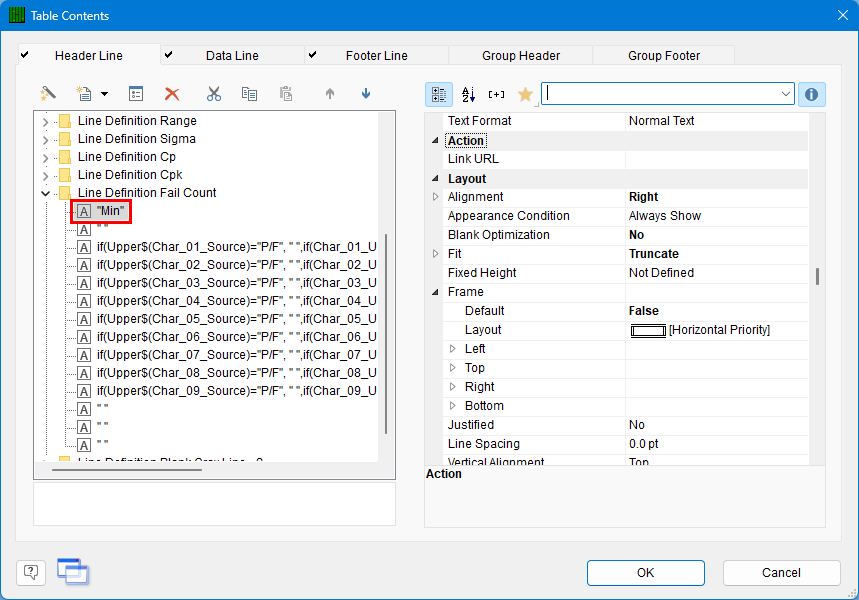
- Back in the Table Contents window choose the new “Line Definition Fail Count” item we just created.
- The very top line of the Line area is the left-most column in the report. At the moment this is going to print “Min”. Double-click that line and the Edit Table screen appears.
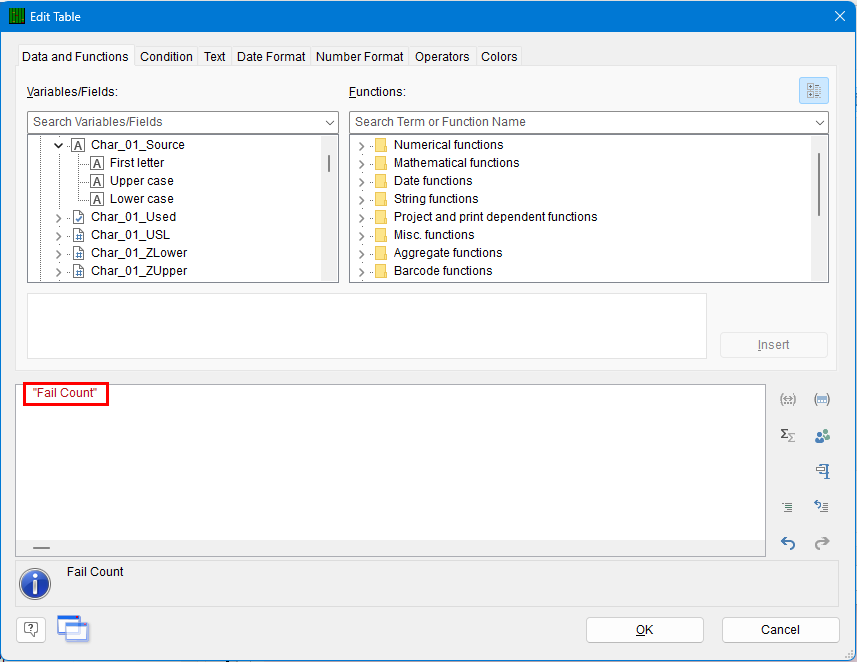
- In the Edit Table screen change “Min” to “Fail Count” to make the label correctly identify the values in that row.
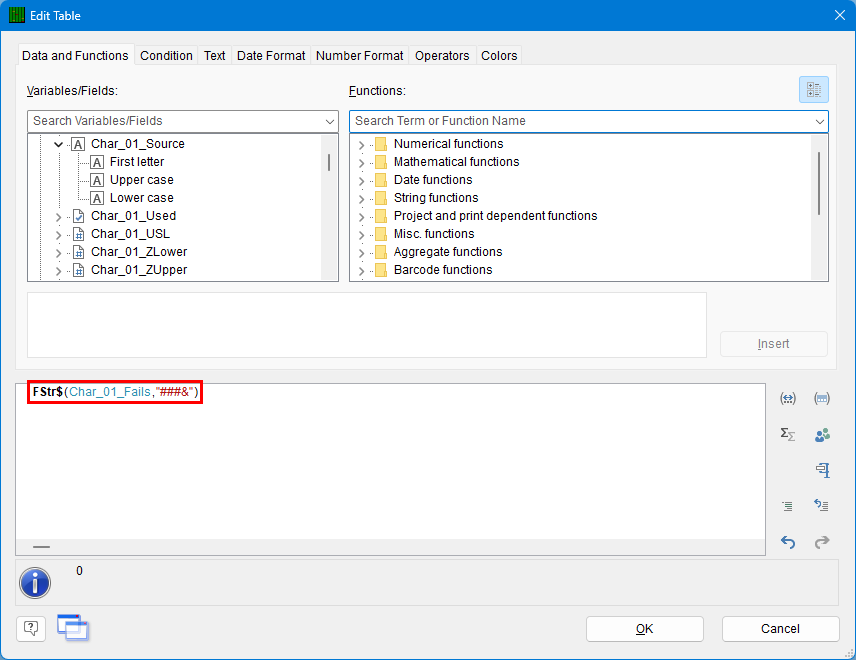
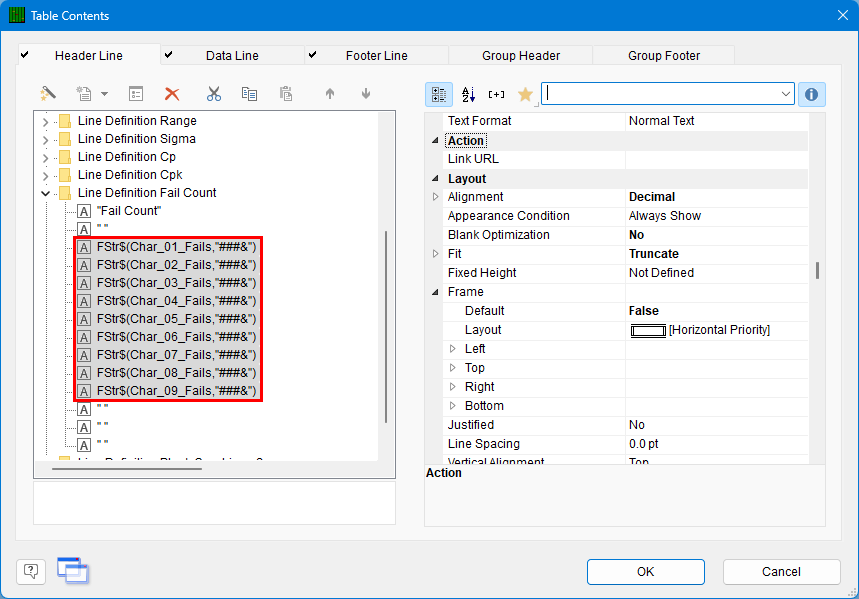
- Back in the Table Contents screen double-click the 3rd line in the Line area (starts with “if(Upper$(Char_01_Source)=…”). In the Edit Table screen replace the whole line showing at the bottom of the screen with “FStr$(Char_01_Fails,"###&")”. The items in the line should turn various colors after typing to show they are recognized as variables, functions, and formatting in the Report Designer. You should see a “0” at the bottom of the window. Highlight and copy the value you typed into your Clipboard (CTRL + C) and click OK.
- Back in the Table Contents window double-click the line right below the “FStr$(Char_01_Fails,…” line, highlight the entire contents in the box at the bottom of the Edit Table window, paste in the clipboard contents (CTRL + V) to replace the old formula, and change the “_1” in the middle of the line to “_2”.
- Continue this process for all dimensions making sure all numbers 1 – 09 are used.
- Click the OK button on the Table Contents window and save your changes to the template.
- You will be asked if you changed the number of dimensions in the report. Answer No.
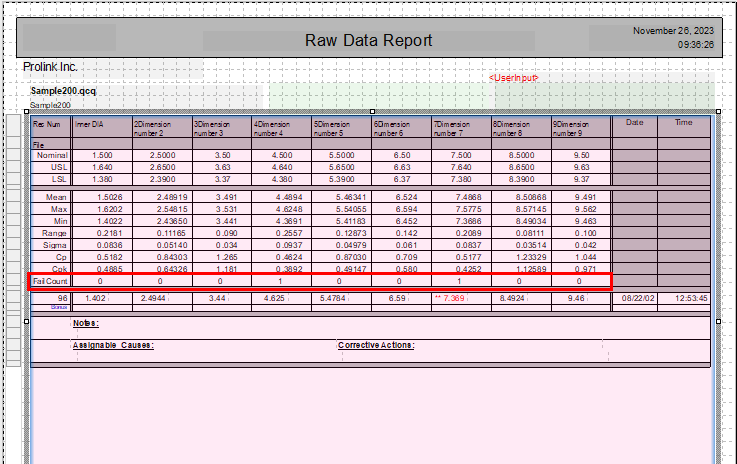
- When you run your report you will now have an additional row in the lines at the top of the report that shows the Fail Count value for each dimension.